Trail Highlight: Bobs Trail
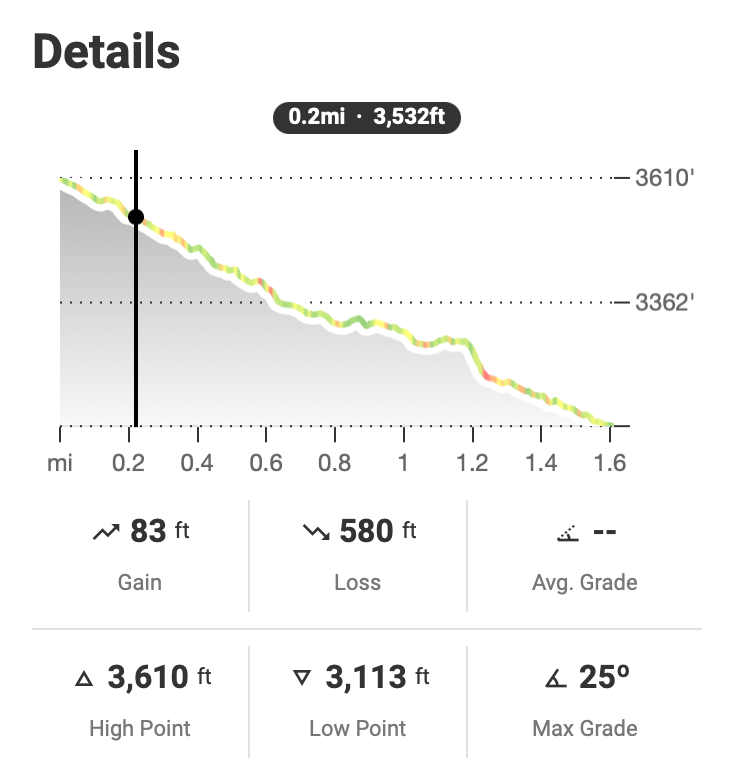
Bob’s Trail is a 1.6-mile black diamond gem with rocky features, split lines, and flowy descents. From feature breakdowns to loop options and parking tips, this guide has everything you need to confidently take on one of Boise’s favorite technical trails.
Trail Stats & First Impressions
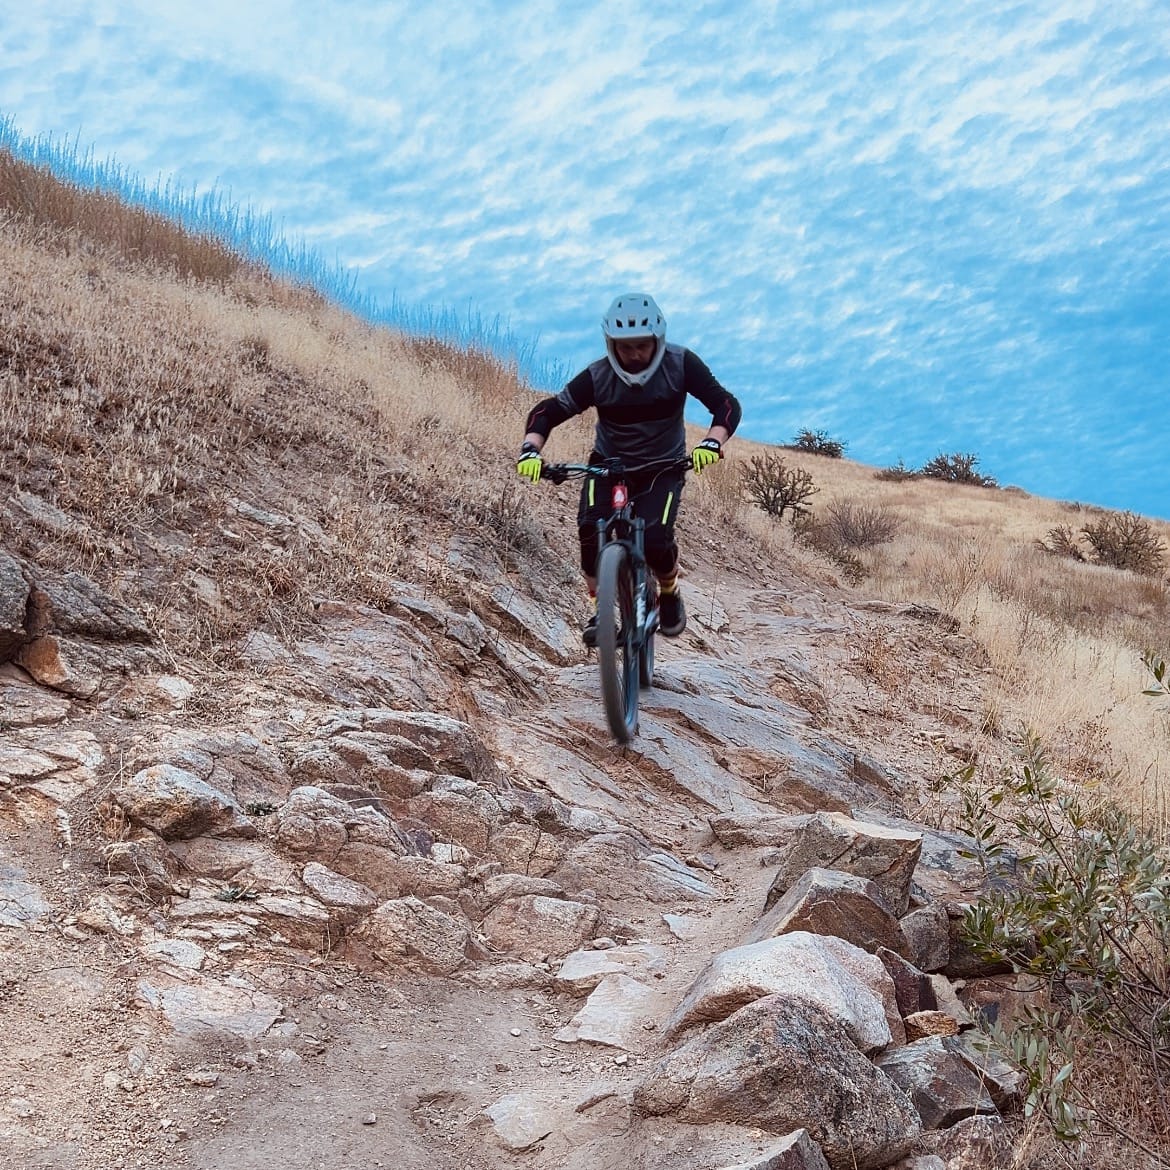
Welcome to Bobs Trail, a local favorite tucked away in the highlands of the Boise foothills! This short but punchy blue square\black diamond trail clocks in at just 1.60 miles, packing a lot of personality into every foot of downhill. Don’t let the mileage fool you; between rocky sections, multiple line choices, and a few small, rollable drops, Bobs Trail keeps you on your toes and is a must ride in the Boise foothills.
Bobs Trail
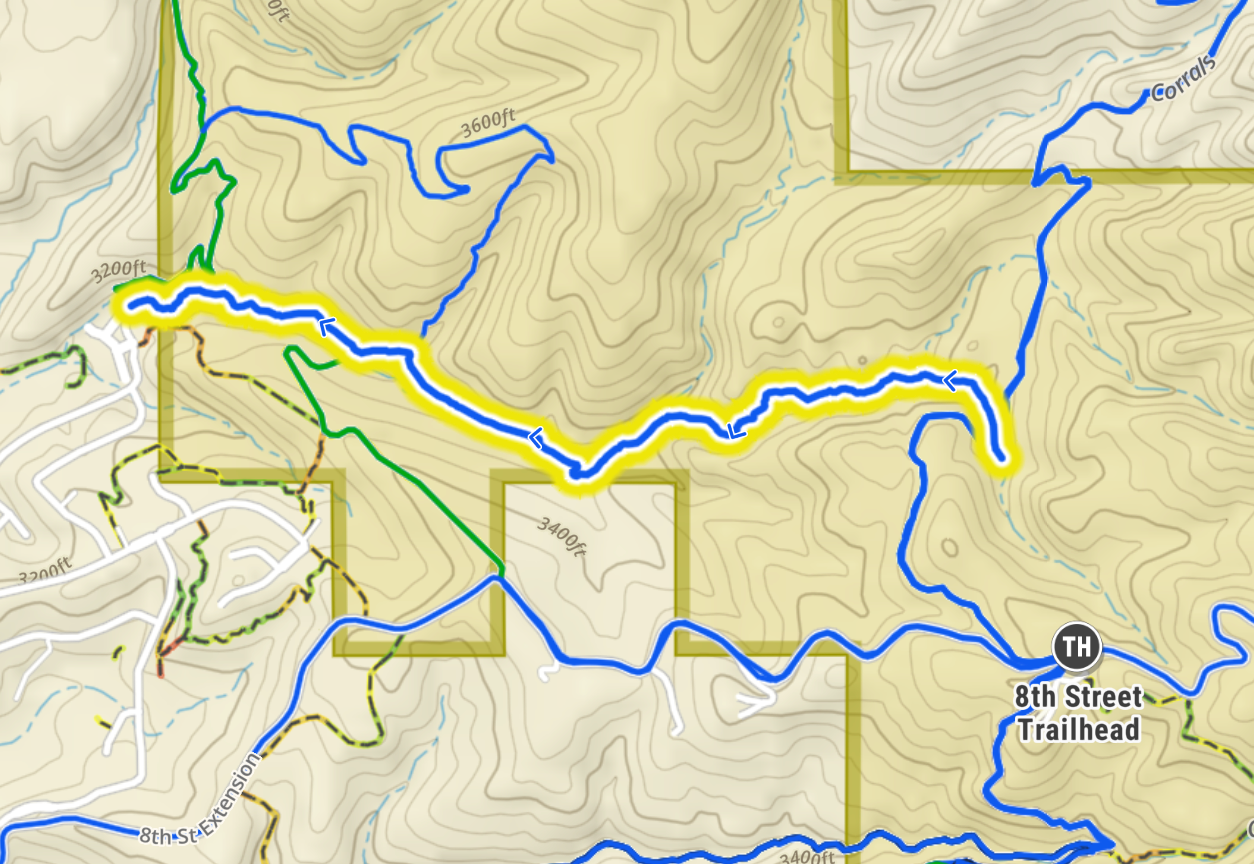
Accessing Bob's Trail
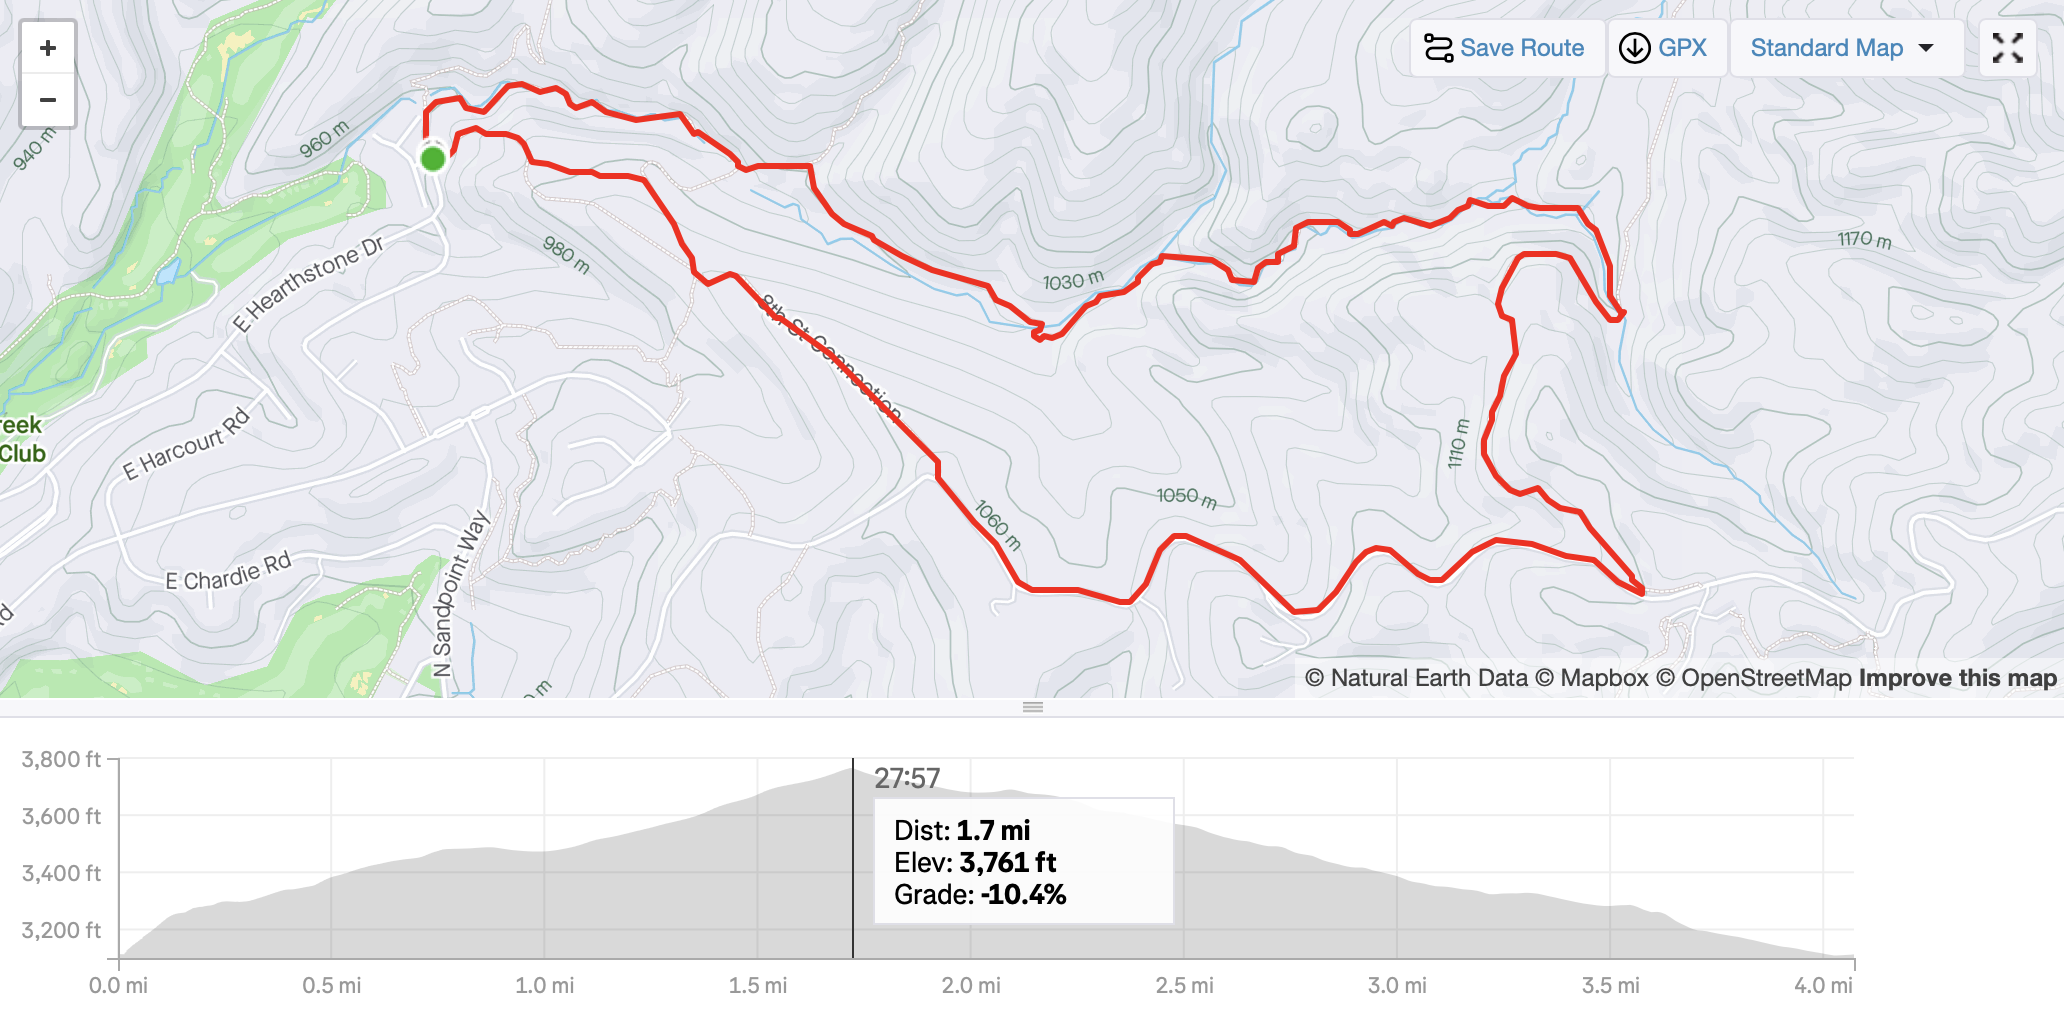
Bob’s Trail sits just off 8th Street Road and is easiest to reach from the 8th Street OHV parking lot. From there, it’s right across the street and connects via Corrals Trail. Personally, I like to loop this one by parking at the bottom of Bobs Trail and taking the 8th Street connector up to 8th Street Road, then linking to Corrals for a nice climb up. The ride from Corrals is downhill to Bob’s Trail. This route gives a good warm-up climb and a little descent to loosen up before connecting to Bobs technical sections. This loop is 700' of climbing and 4 miles long.
If you’re aiming for speed on the downhill, the fastest riders get to the bottom in just under 5 minutes. For us filthy casuals, though, 8-12 minutes from the top of Bobs to the bottom lets us savor the features (and maybe save our legs!). Now let’s get into the details with GoPro footage, photos, and the kind of ride you can expect on this classic trail.
Feature Breakdown: The First Rock Section
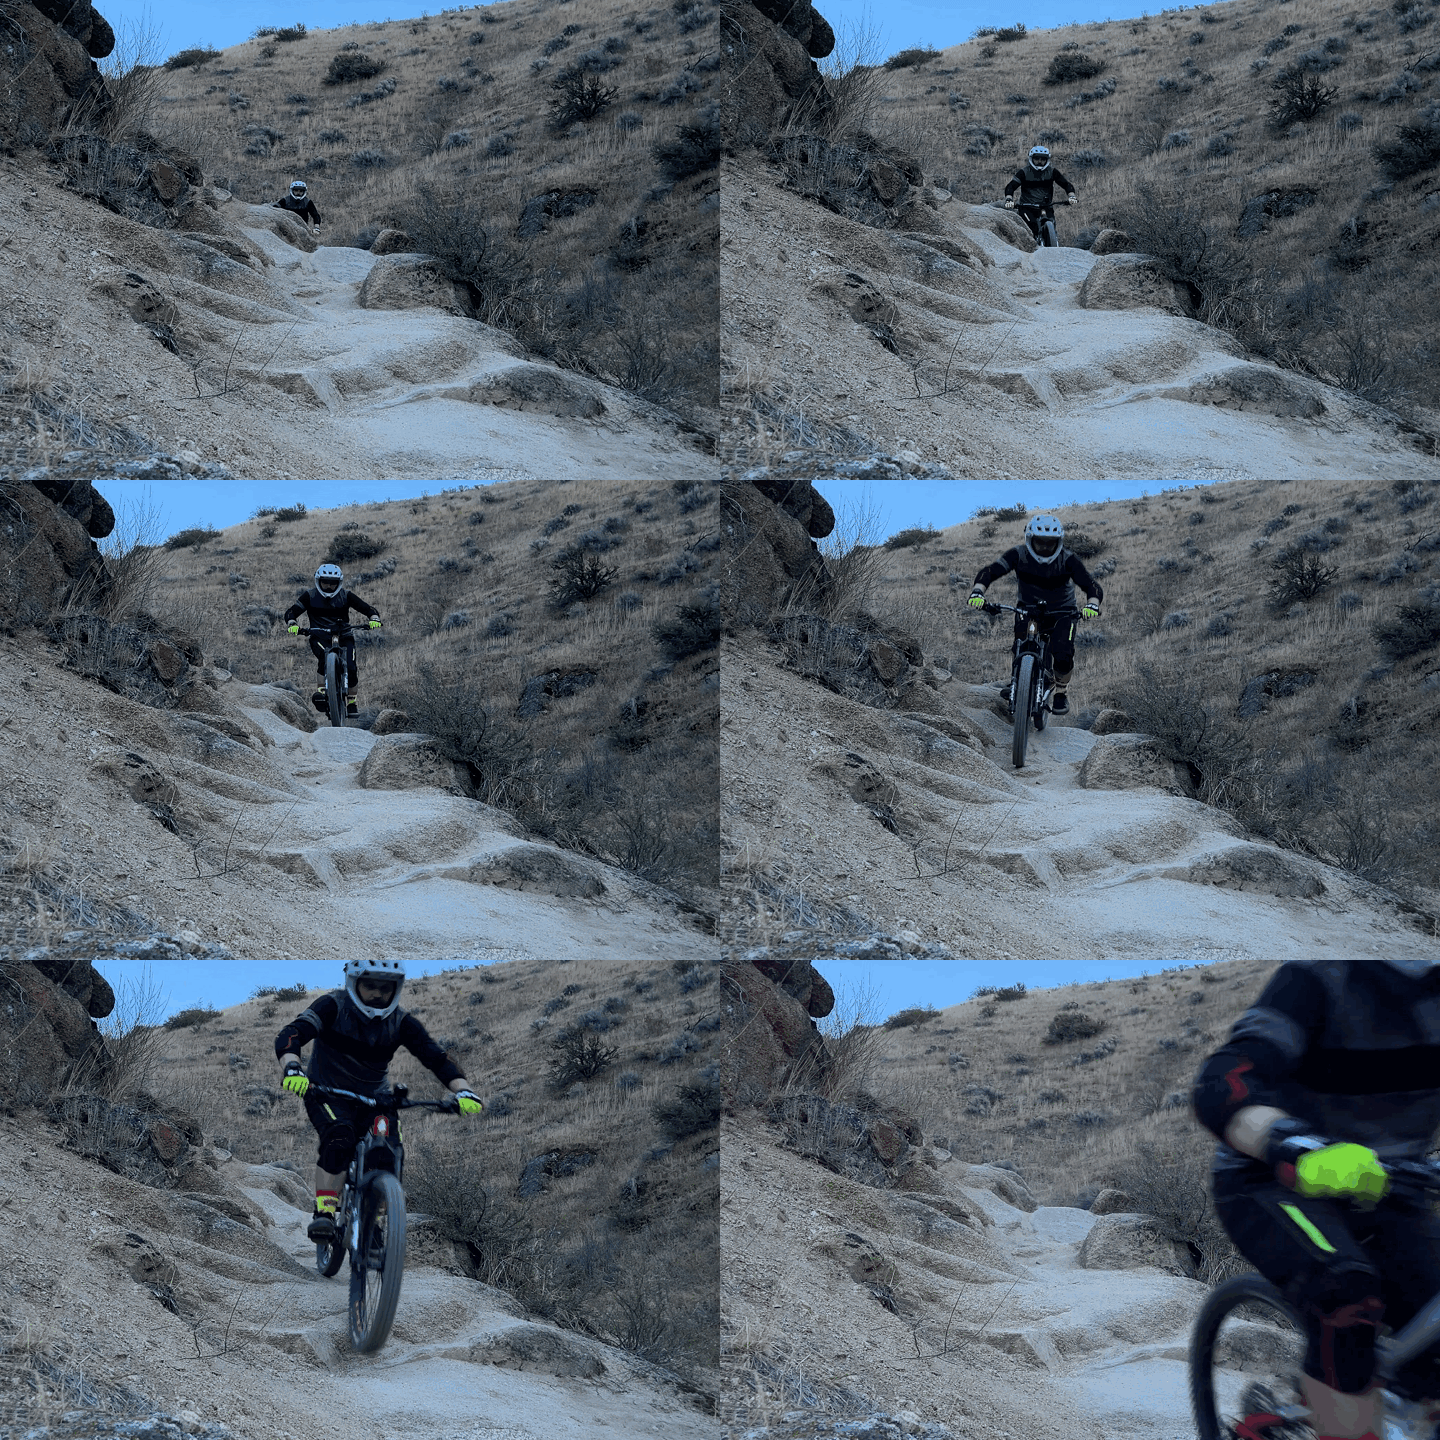
The first big challenge on Bobs hits fast, right near the top. This rock section is one of the gnarliest on the trail, setting the tone for everything to come. Here’s the breakdown: it’s a split-line feature, so choose your line here and fully commit.
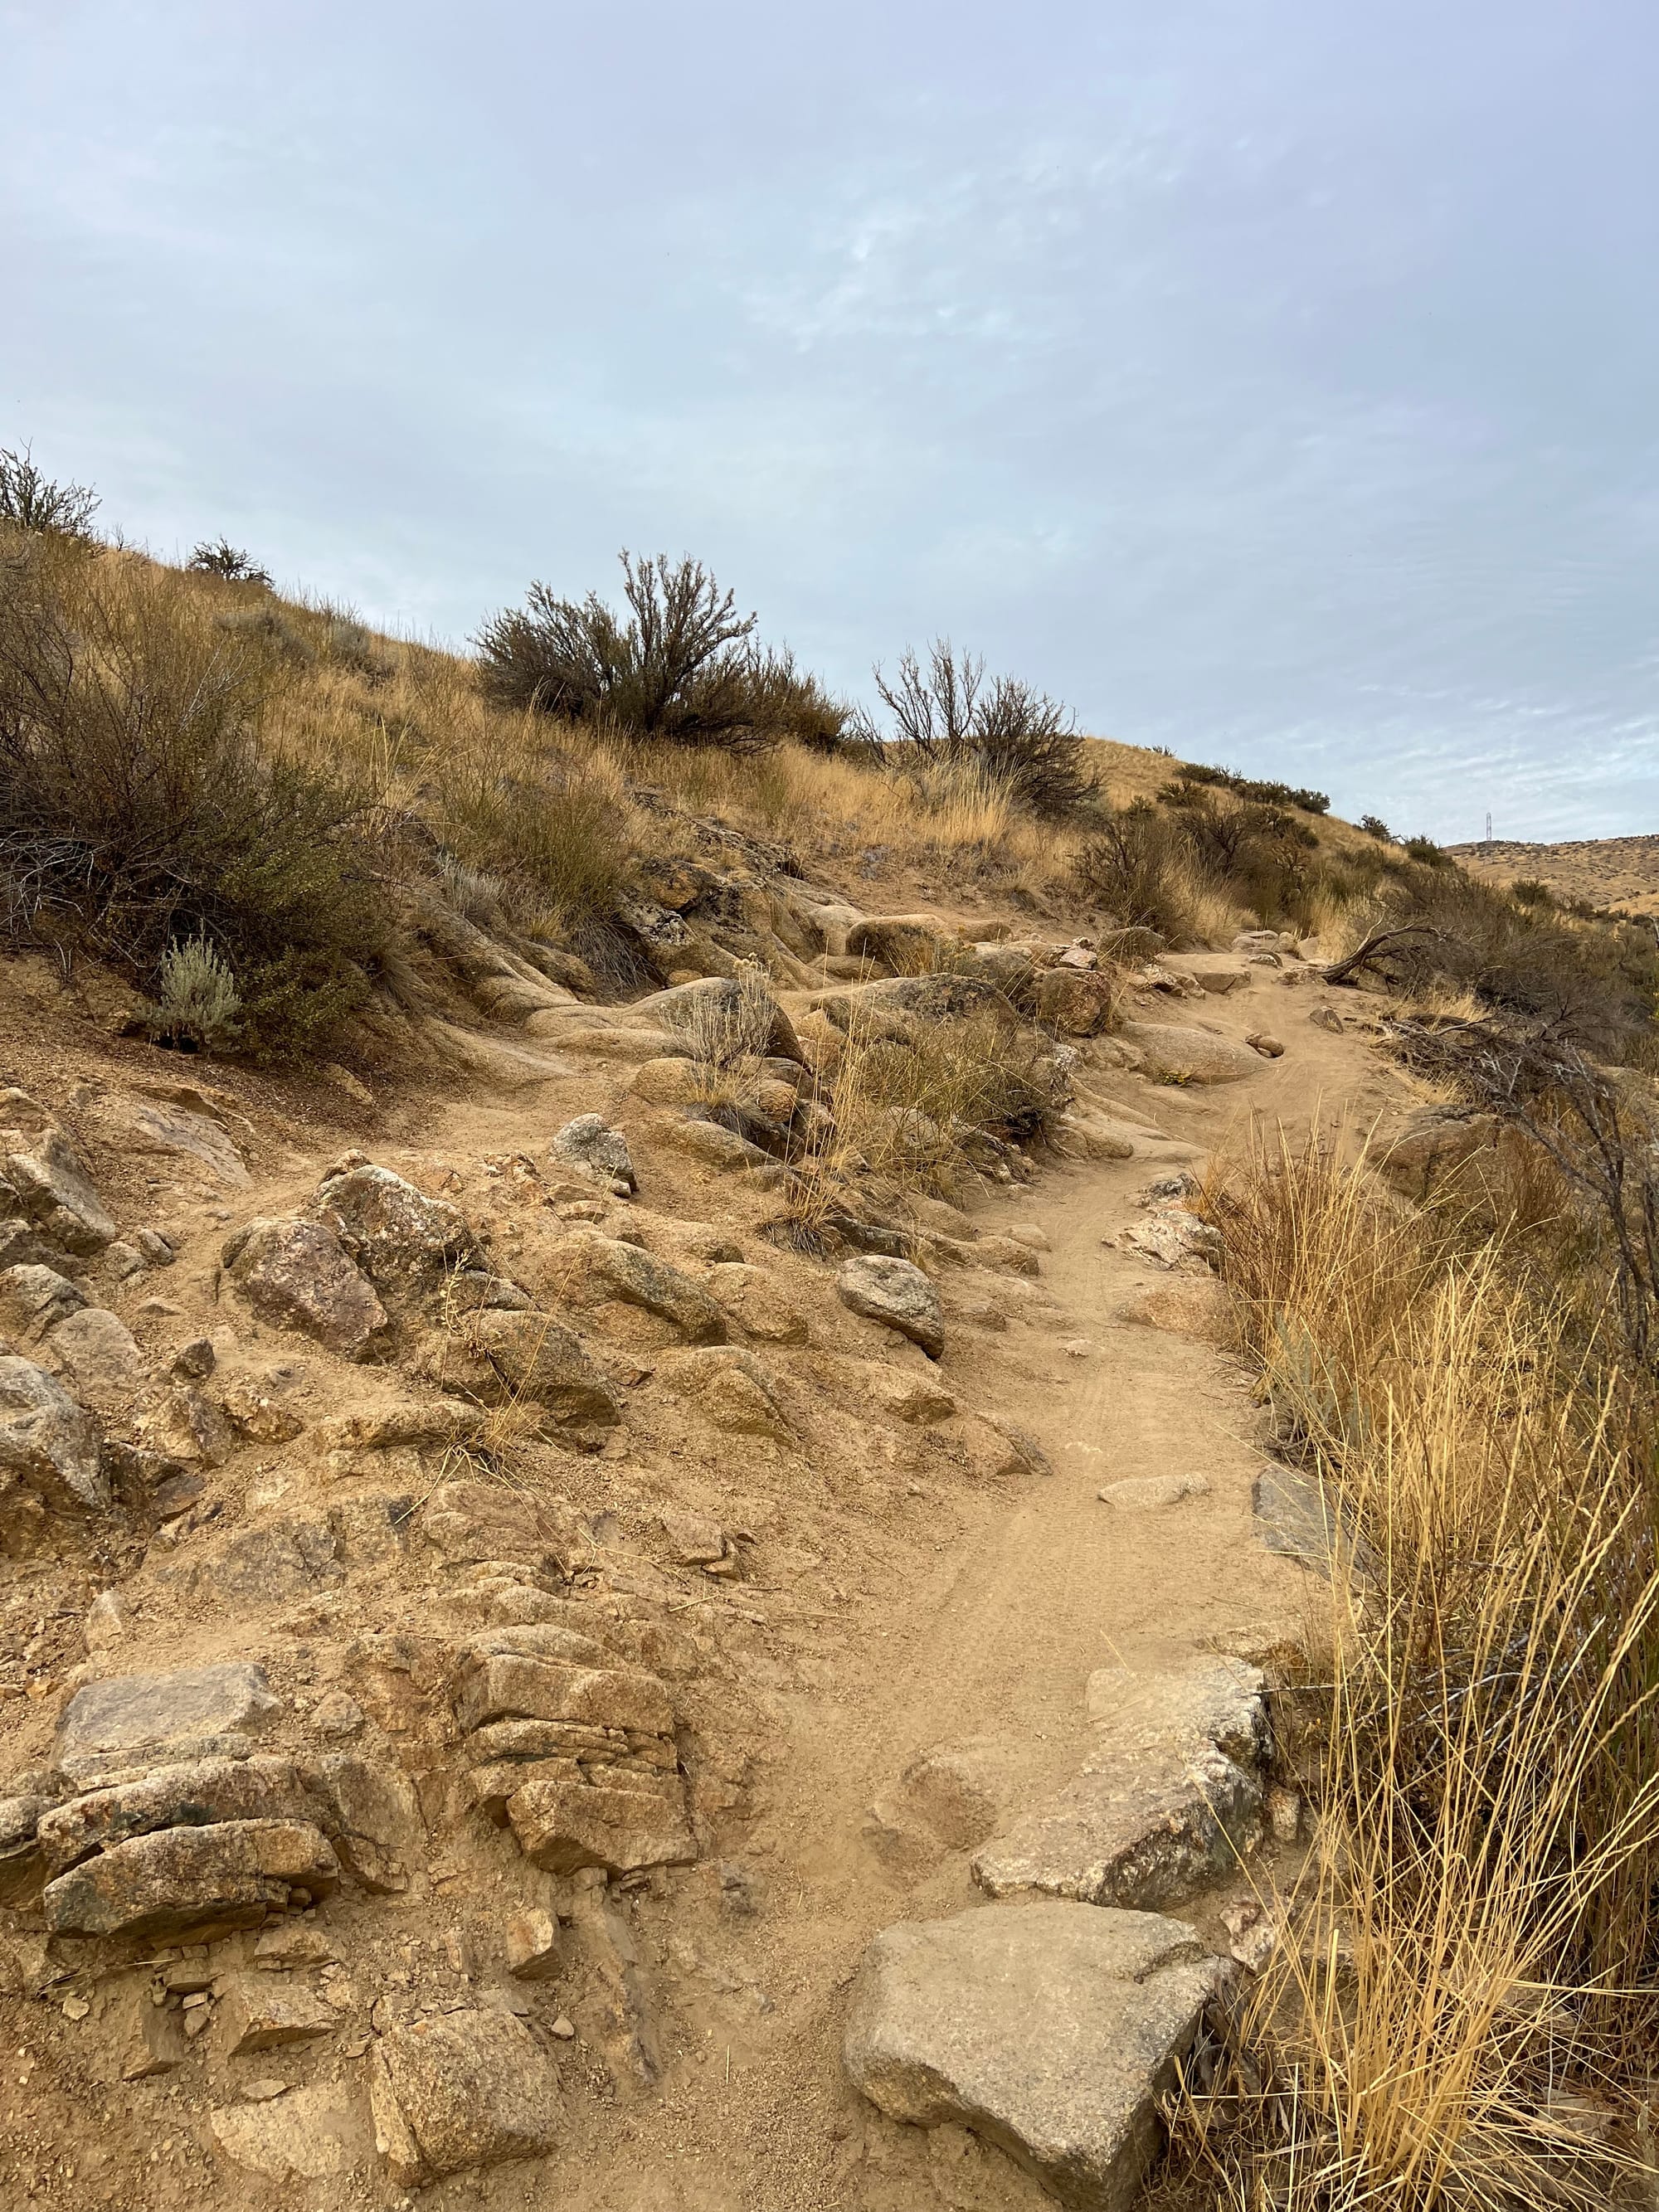
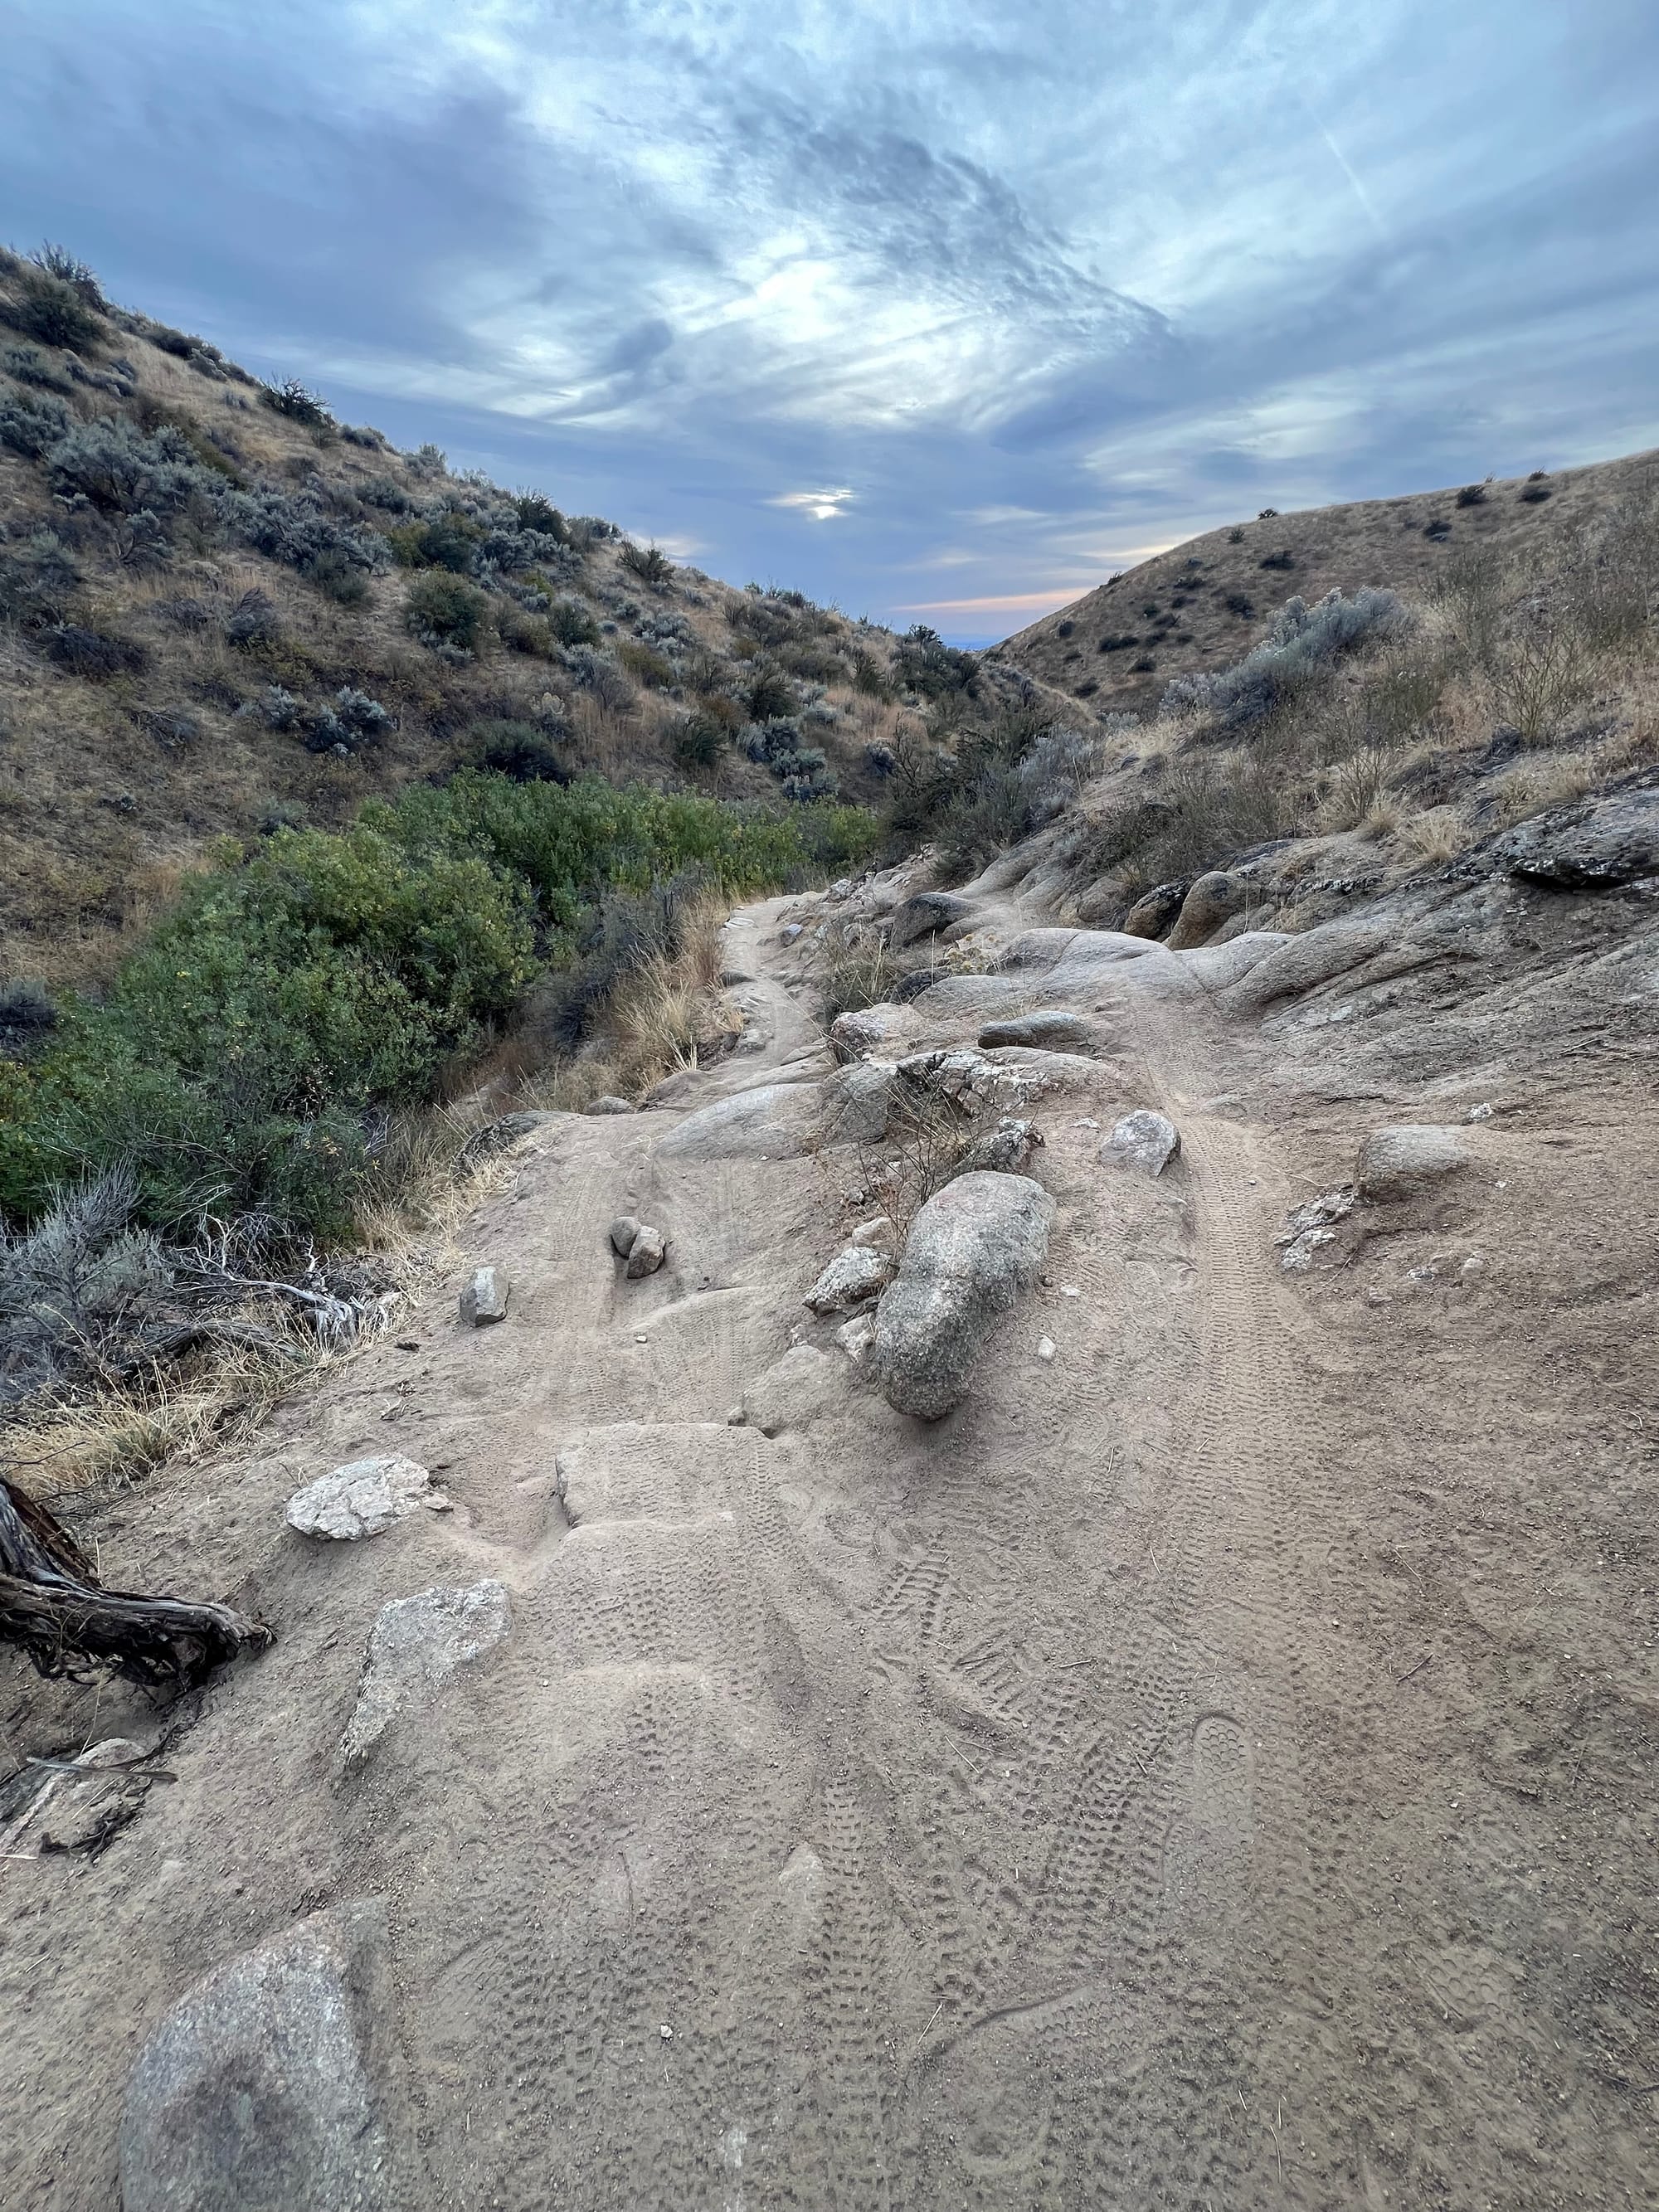
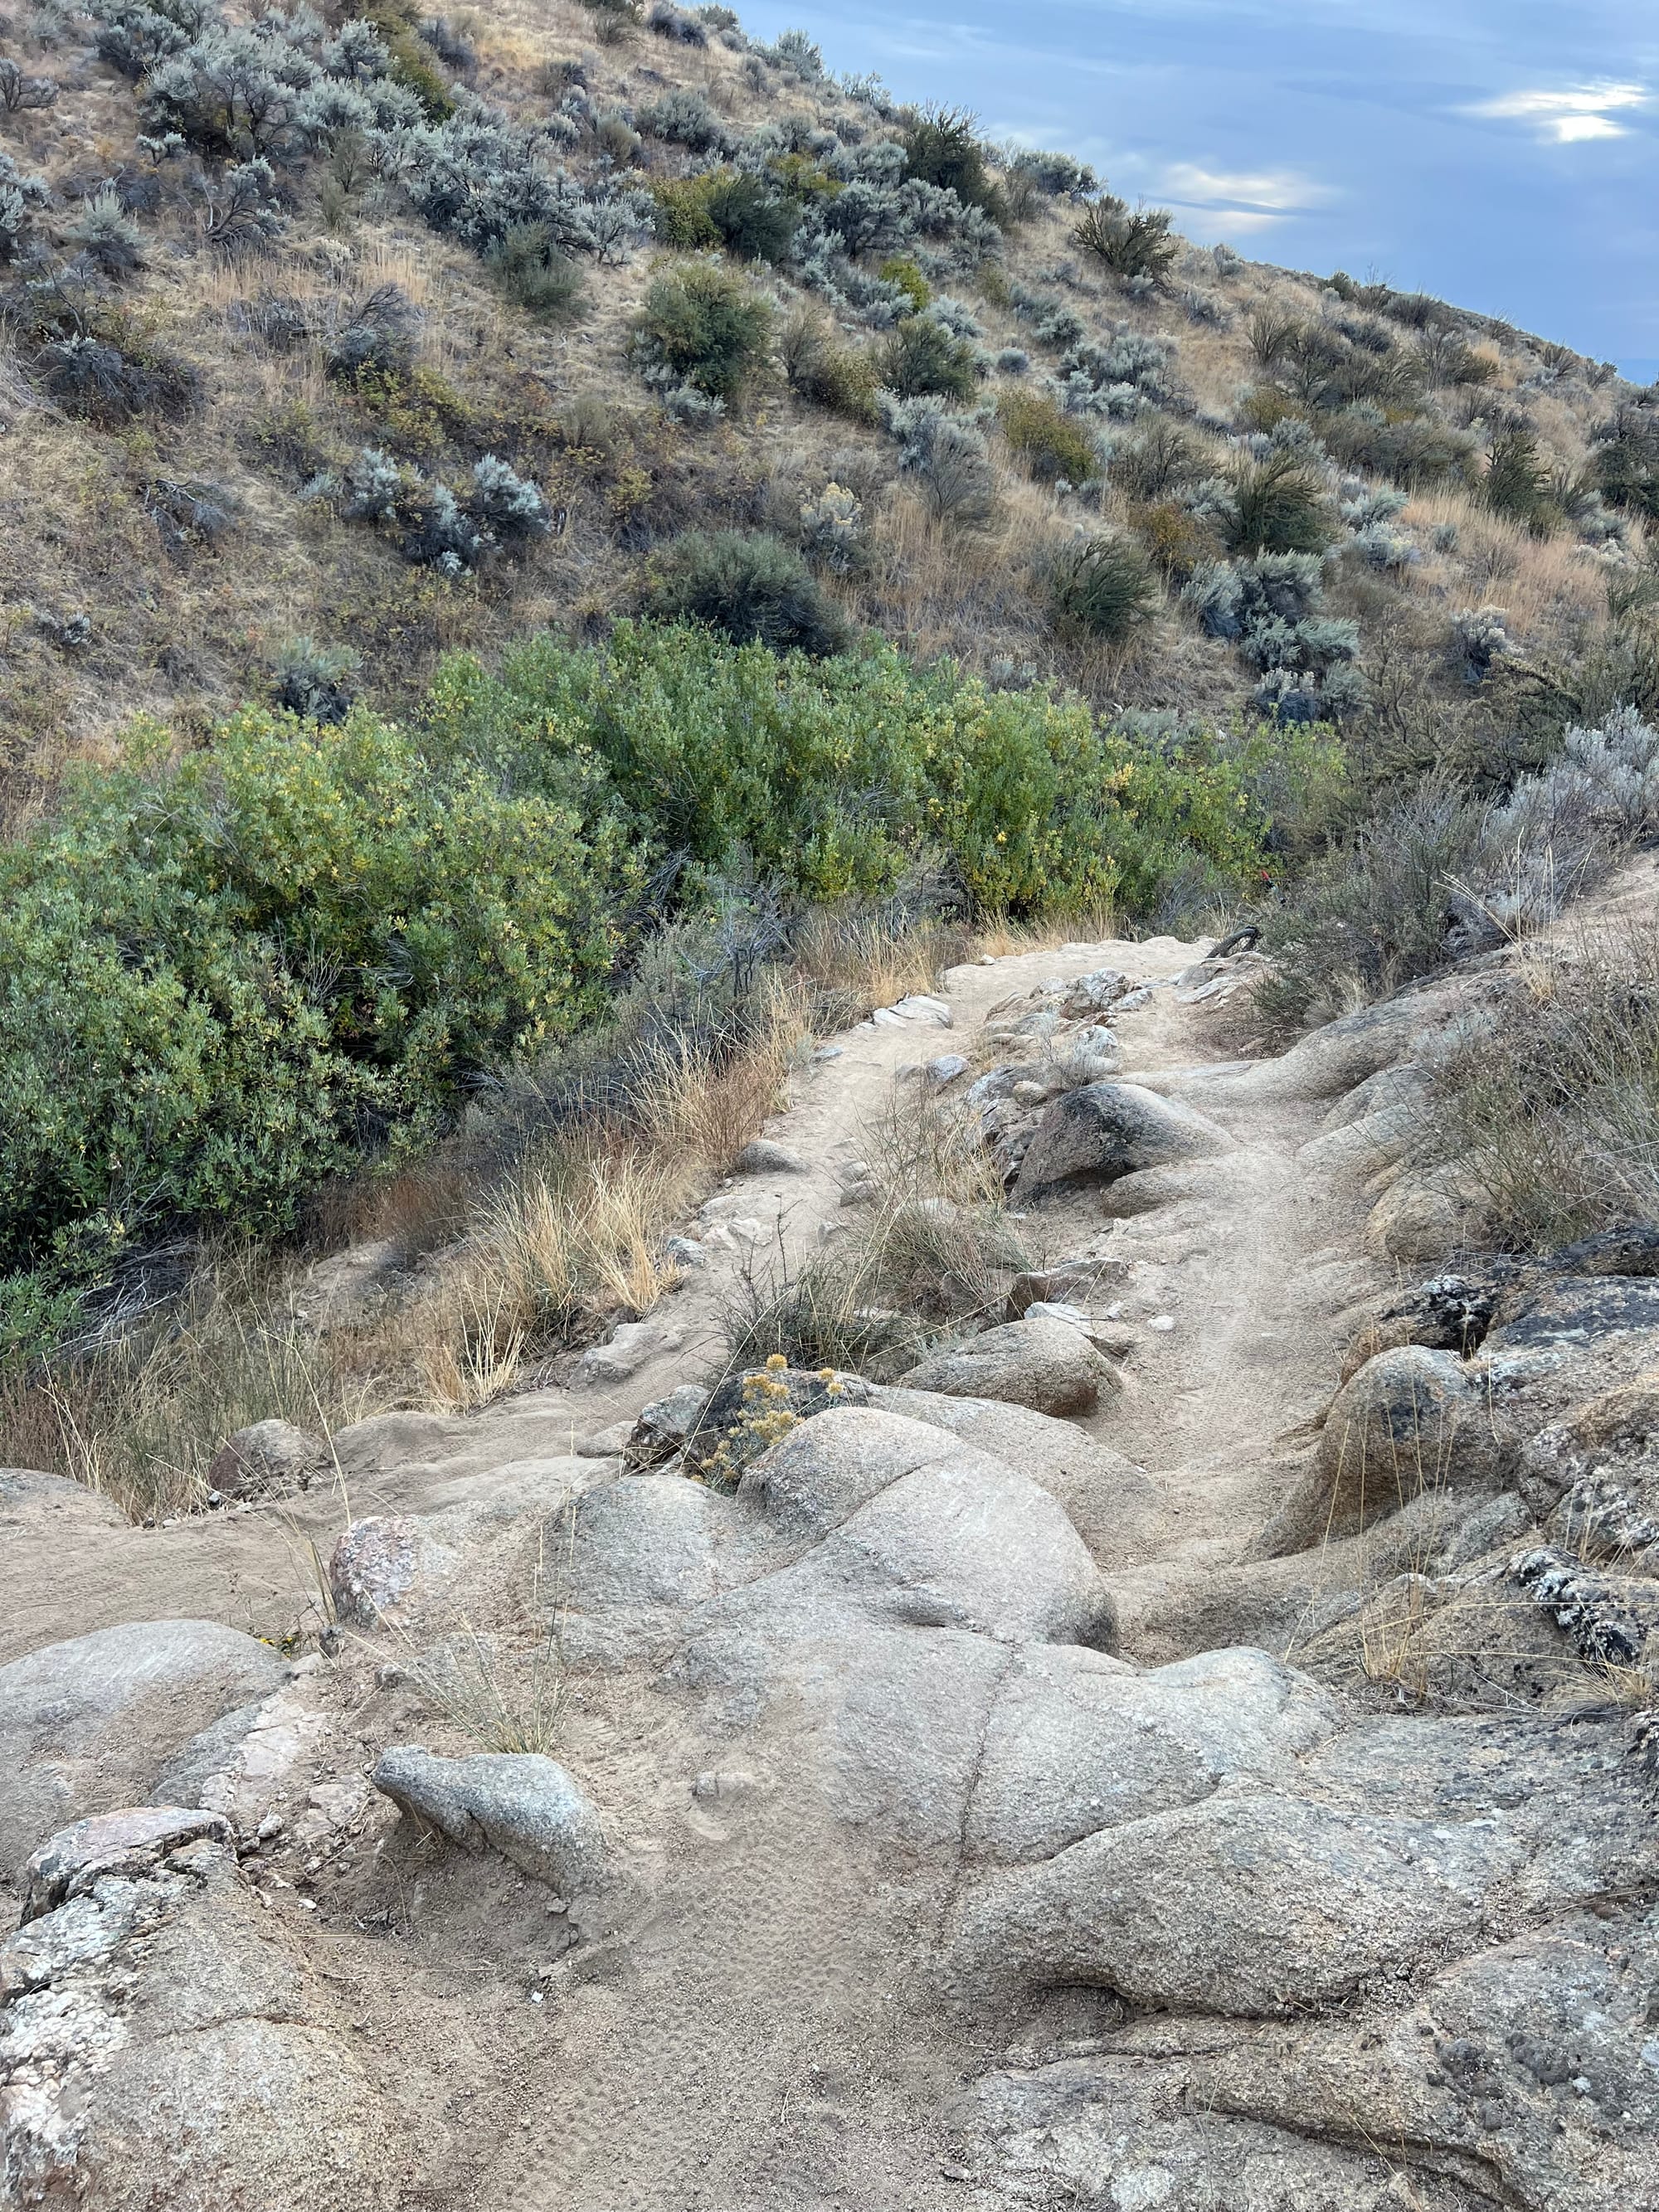
The first rock section split lane.
If you’re taking the low line, you’ll find a rollable option that’s more forgiving, but don’t let that fool you. The off-camber here tilts you slightly downhill, adding just enough spice to keep things interesting. A fall here sends you rolling toward a creek below—not the best start to the ride—so if you’re not feeling it, no shame in giving this section a quick walk-through.

The high line, cutting to the right, is the more advanced choice. It’s less forgiving and requires you to really commit from the get-go. I’ll admit, I haven’t tackled this line yet, but I’ve watched a few riders send it. From what I can tell, it’s a blast for those with the confidence to hit it.
Feature Breakdown: The Second Rock Feature
Right after the first rock section, you’ll find yourself facing the second rock feature on Bobs. Heads-up: this one can be a bit tricky if you’re not prepped for it. This rock is slightly off-camber, and there are a few ways to approach it depending on your skill level and the type of bike you’re rocking.
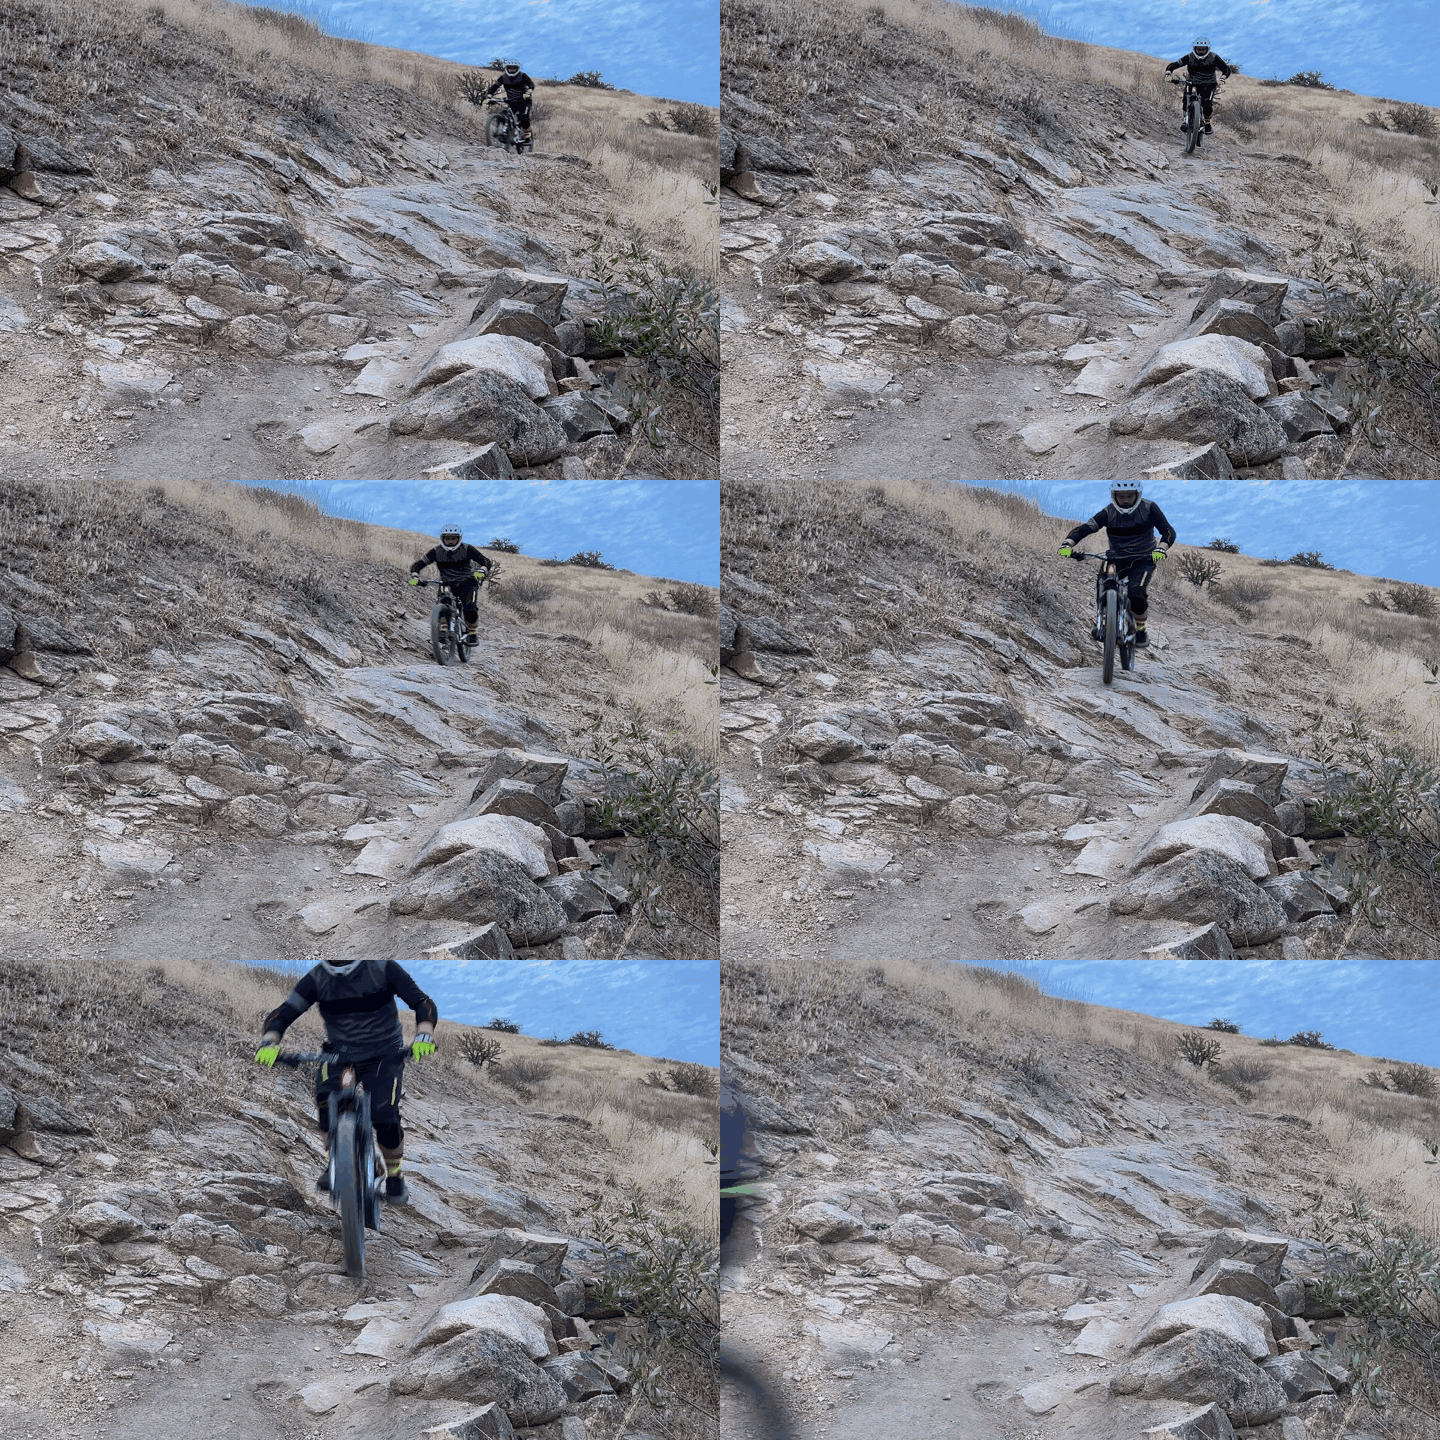

For the smoother line, you can roll the whole thing. Just be mindful of those loose pebbles, it’s not a spot you want to stall out on. If you’ve got the confidence (and the suspension!), you can float right over it and ride straight into the corner below. Either way, once you get a feel for it, this rock section becomes a fun challenge that adds some unique flow to the ride.
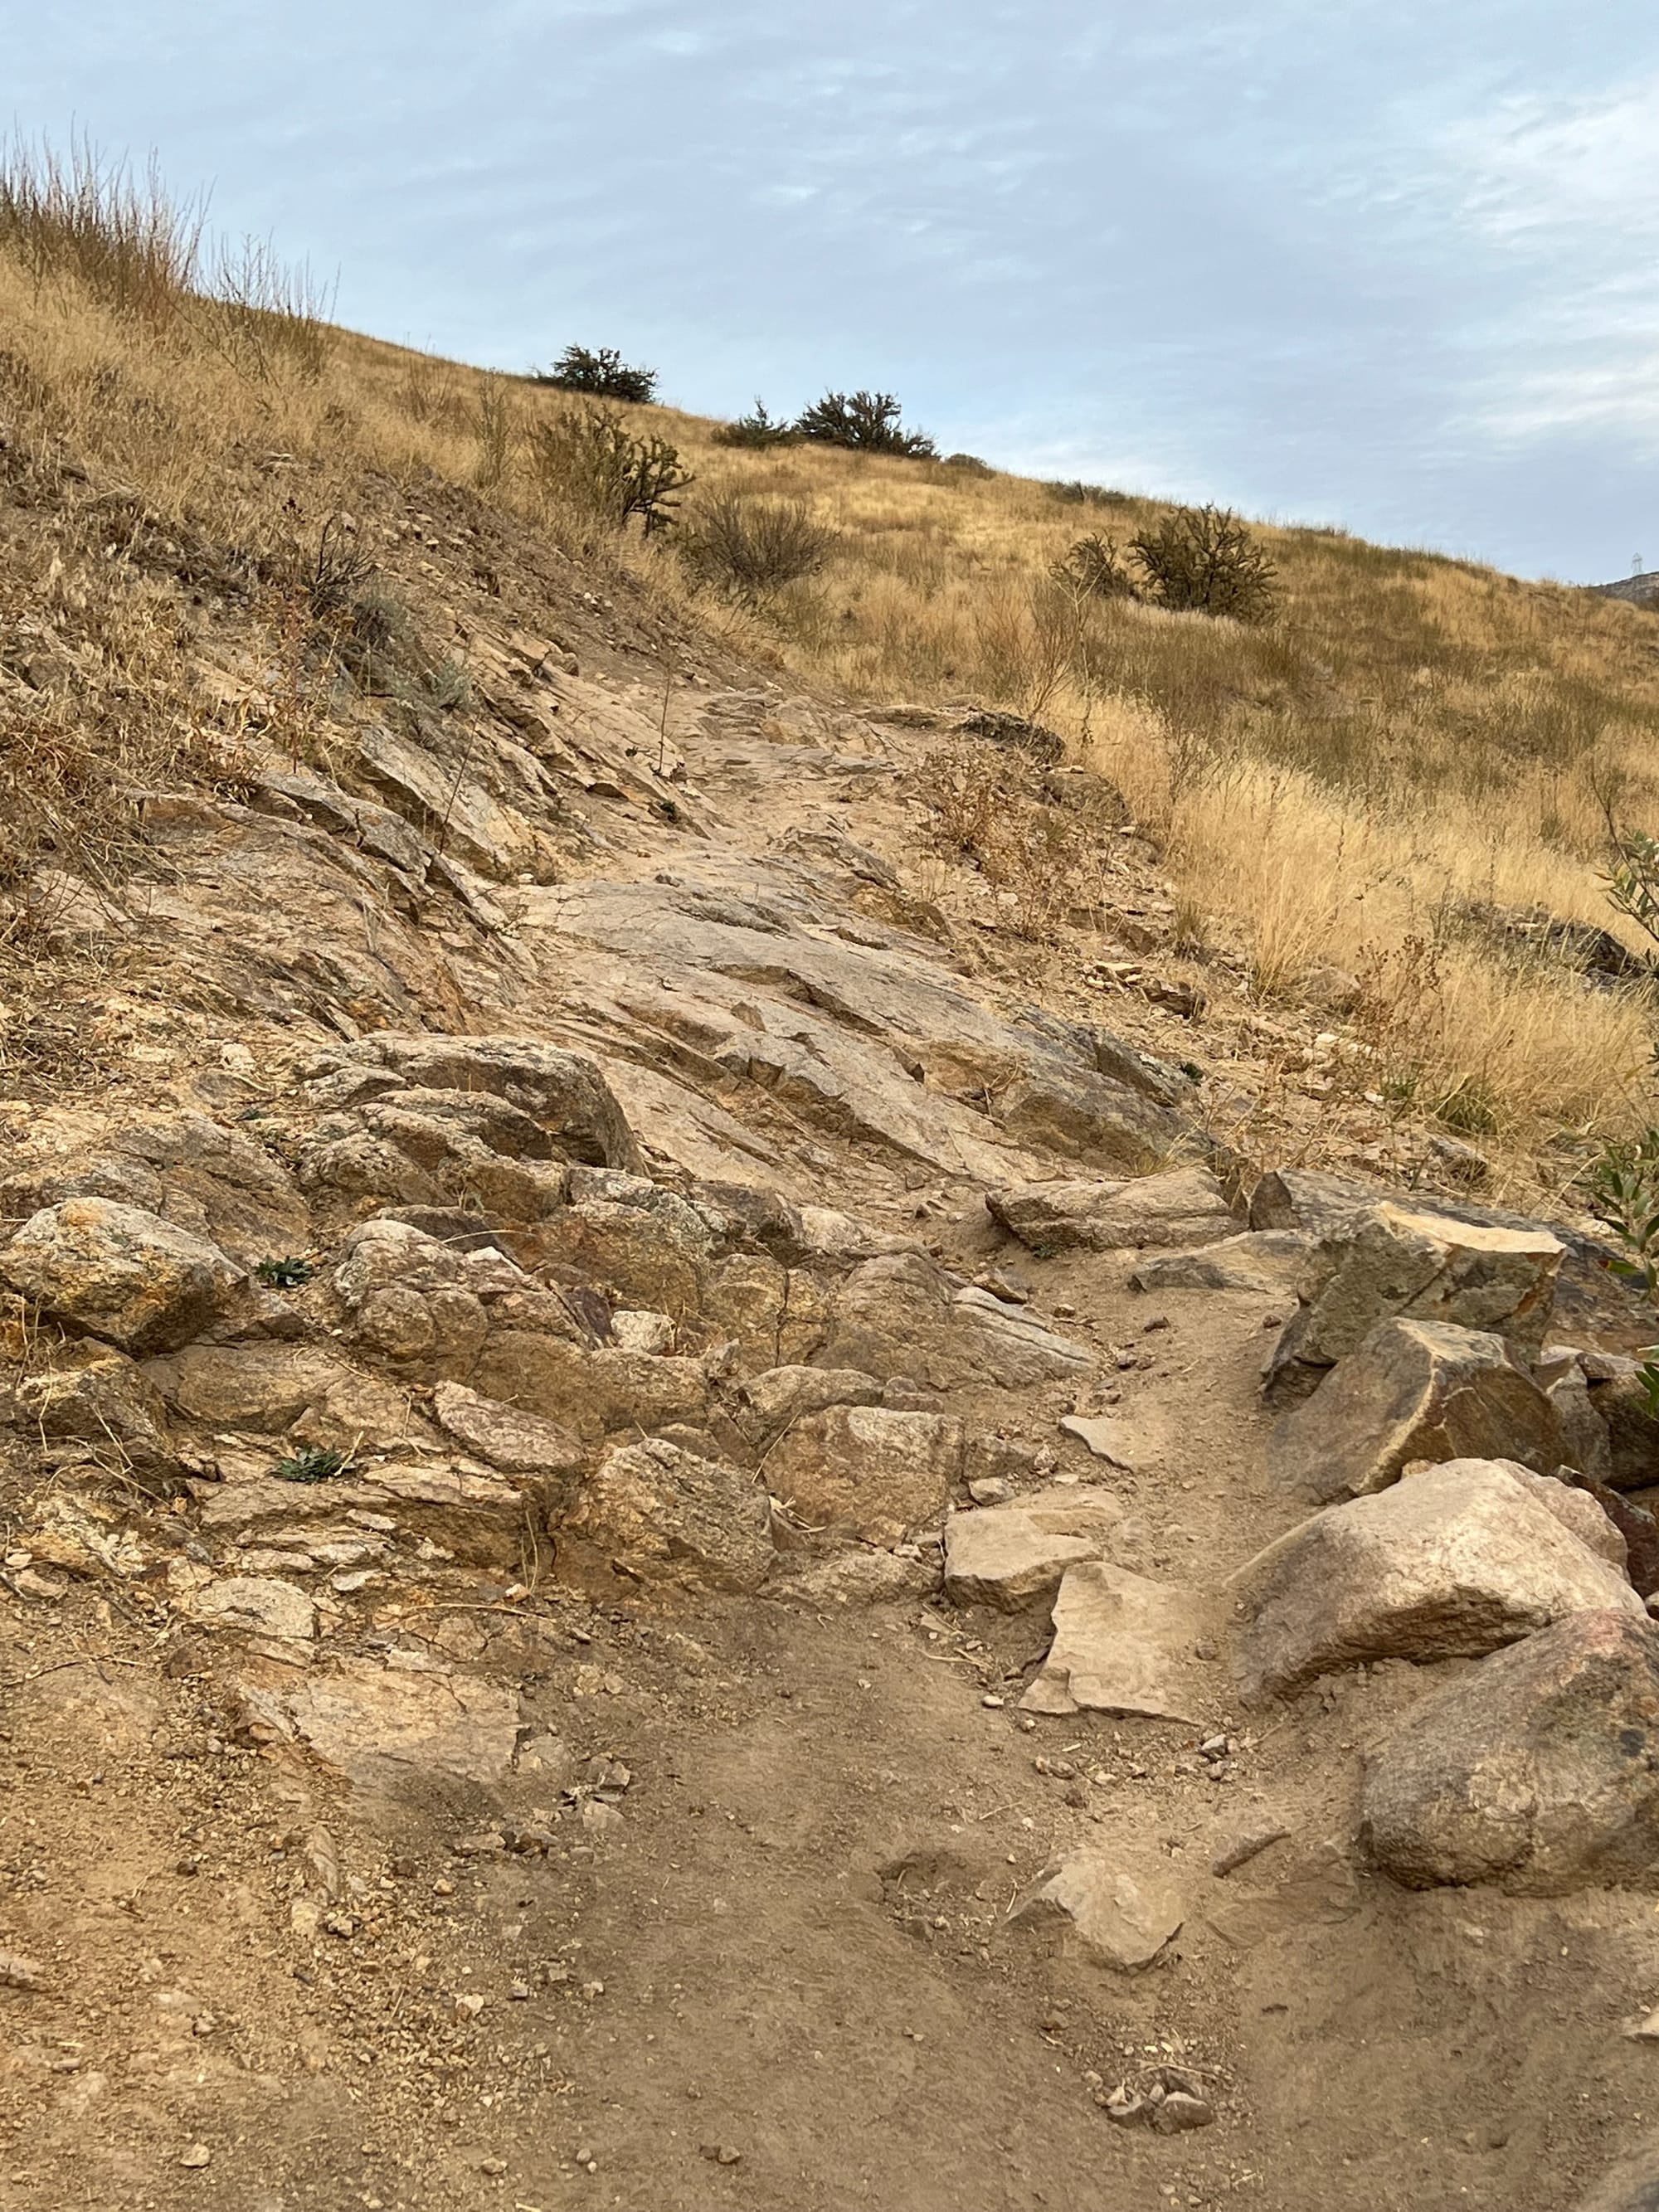
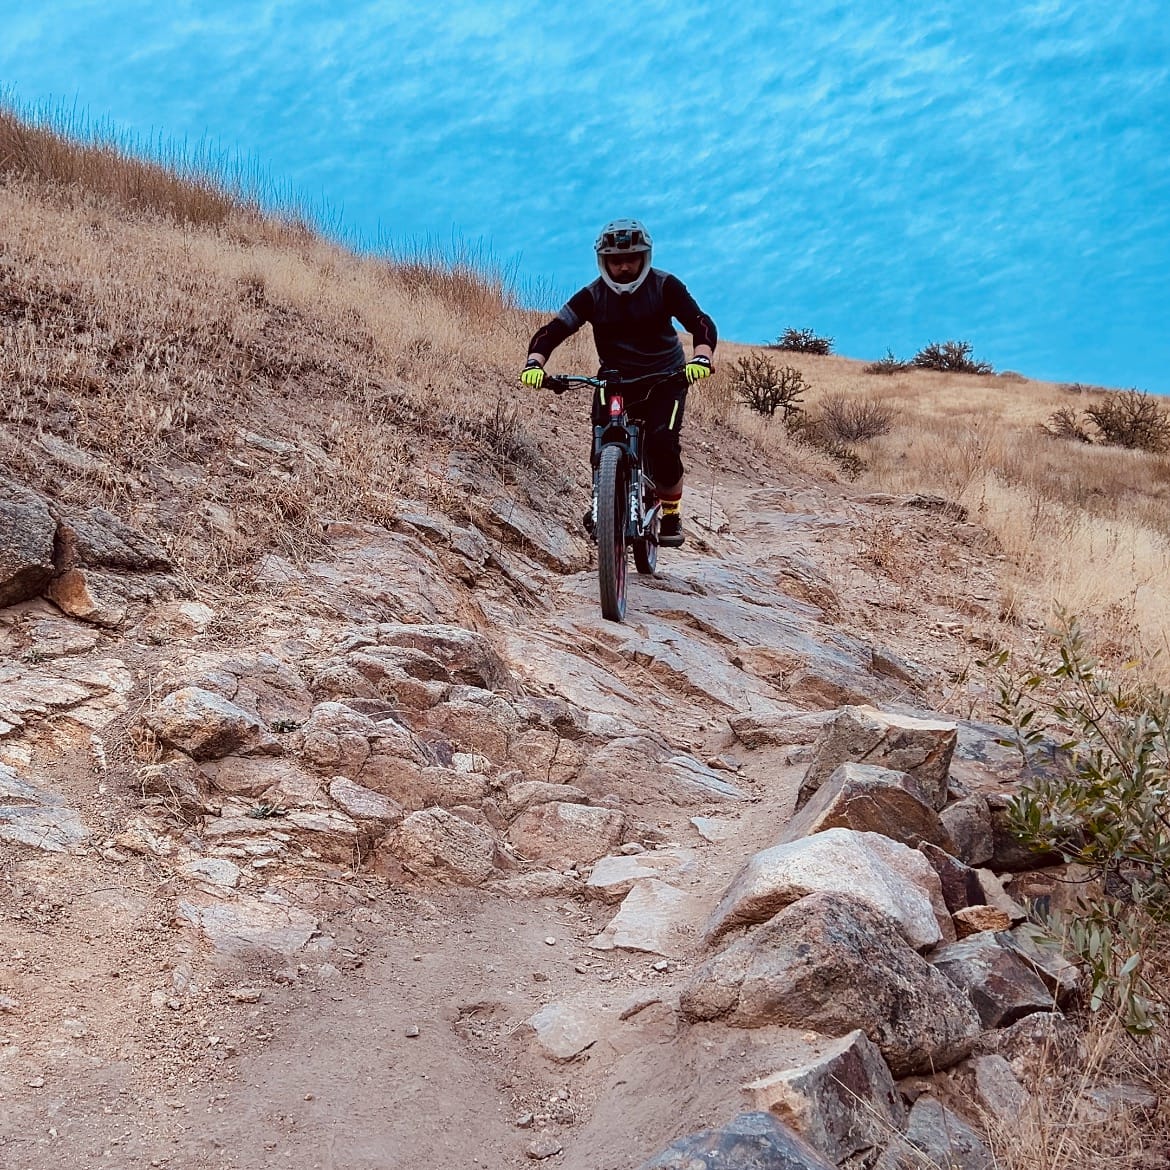
Take a look at the GoPro footage below to see how I ride it.
Enjoying the ride?
Your support helps me keep Filthy Casual MTB free of paywalls, so I can continue sharing all the local trail knowledge and adventures with you. If you’d like to help out, check out my support page or the Store Page to keep the stoke alive!

Feature Breakdown: The Third Rock Feature
A couple corners after you cruise across the creek bed, you’ll come up on the third rock feature. It’s a bit sneaky since it’s right after a slight climb, and being a bit blind on approach, it can feel intimidating. But the good news? This one’s fully rollable.
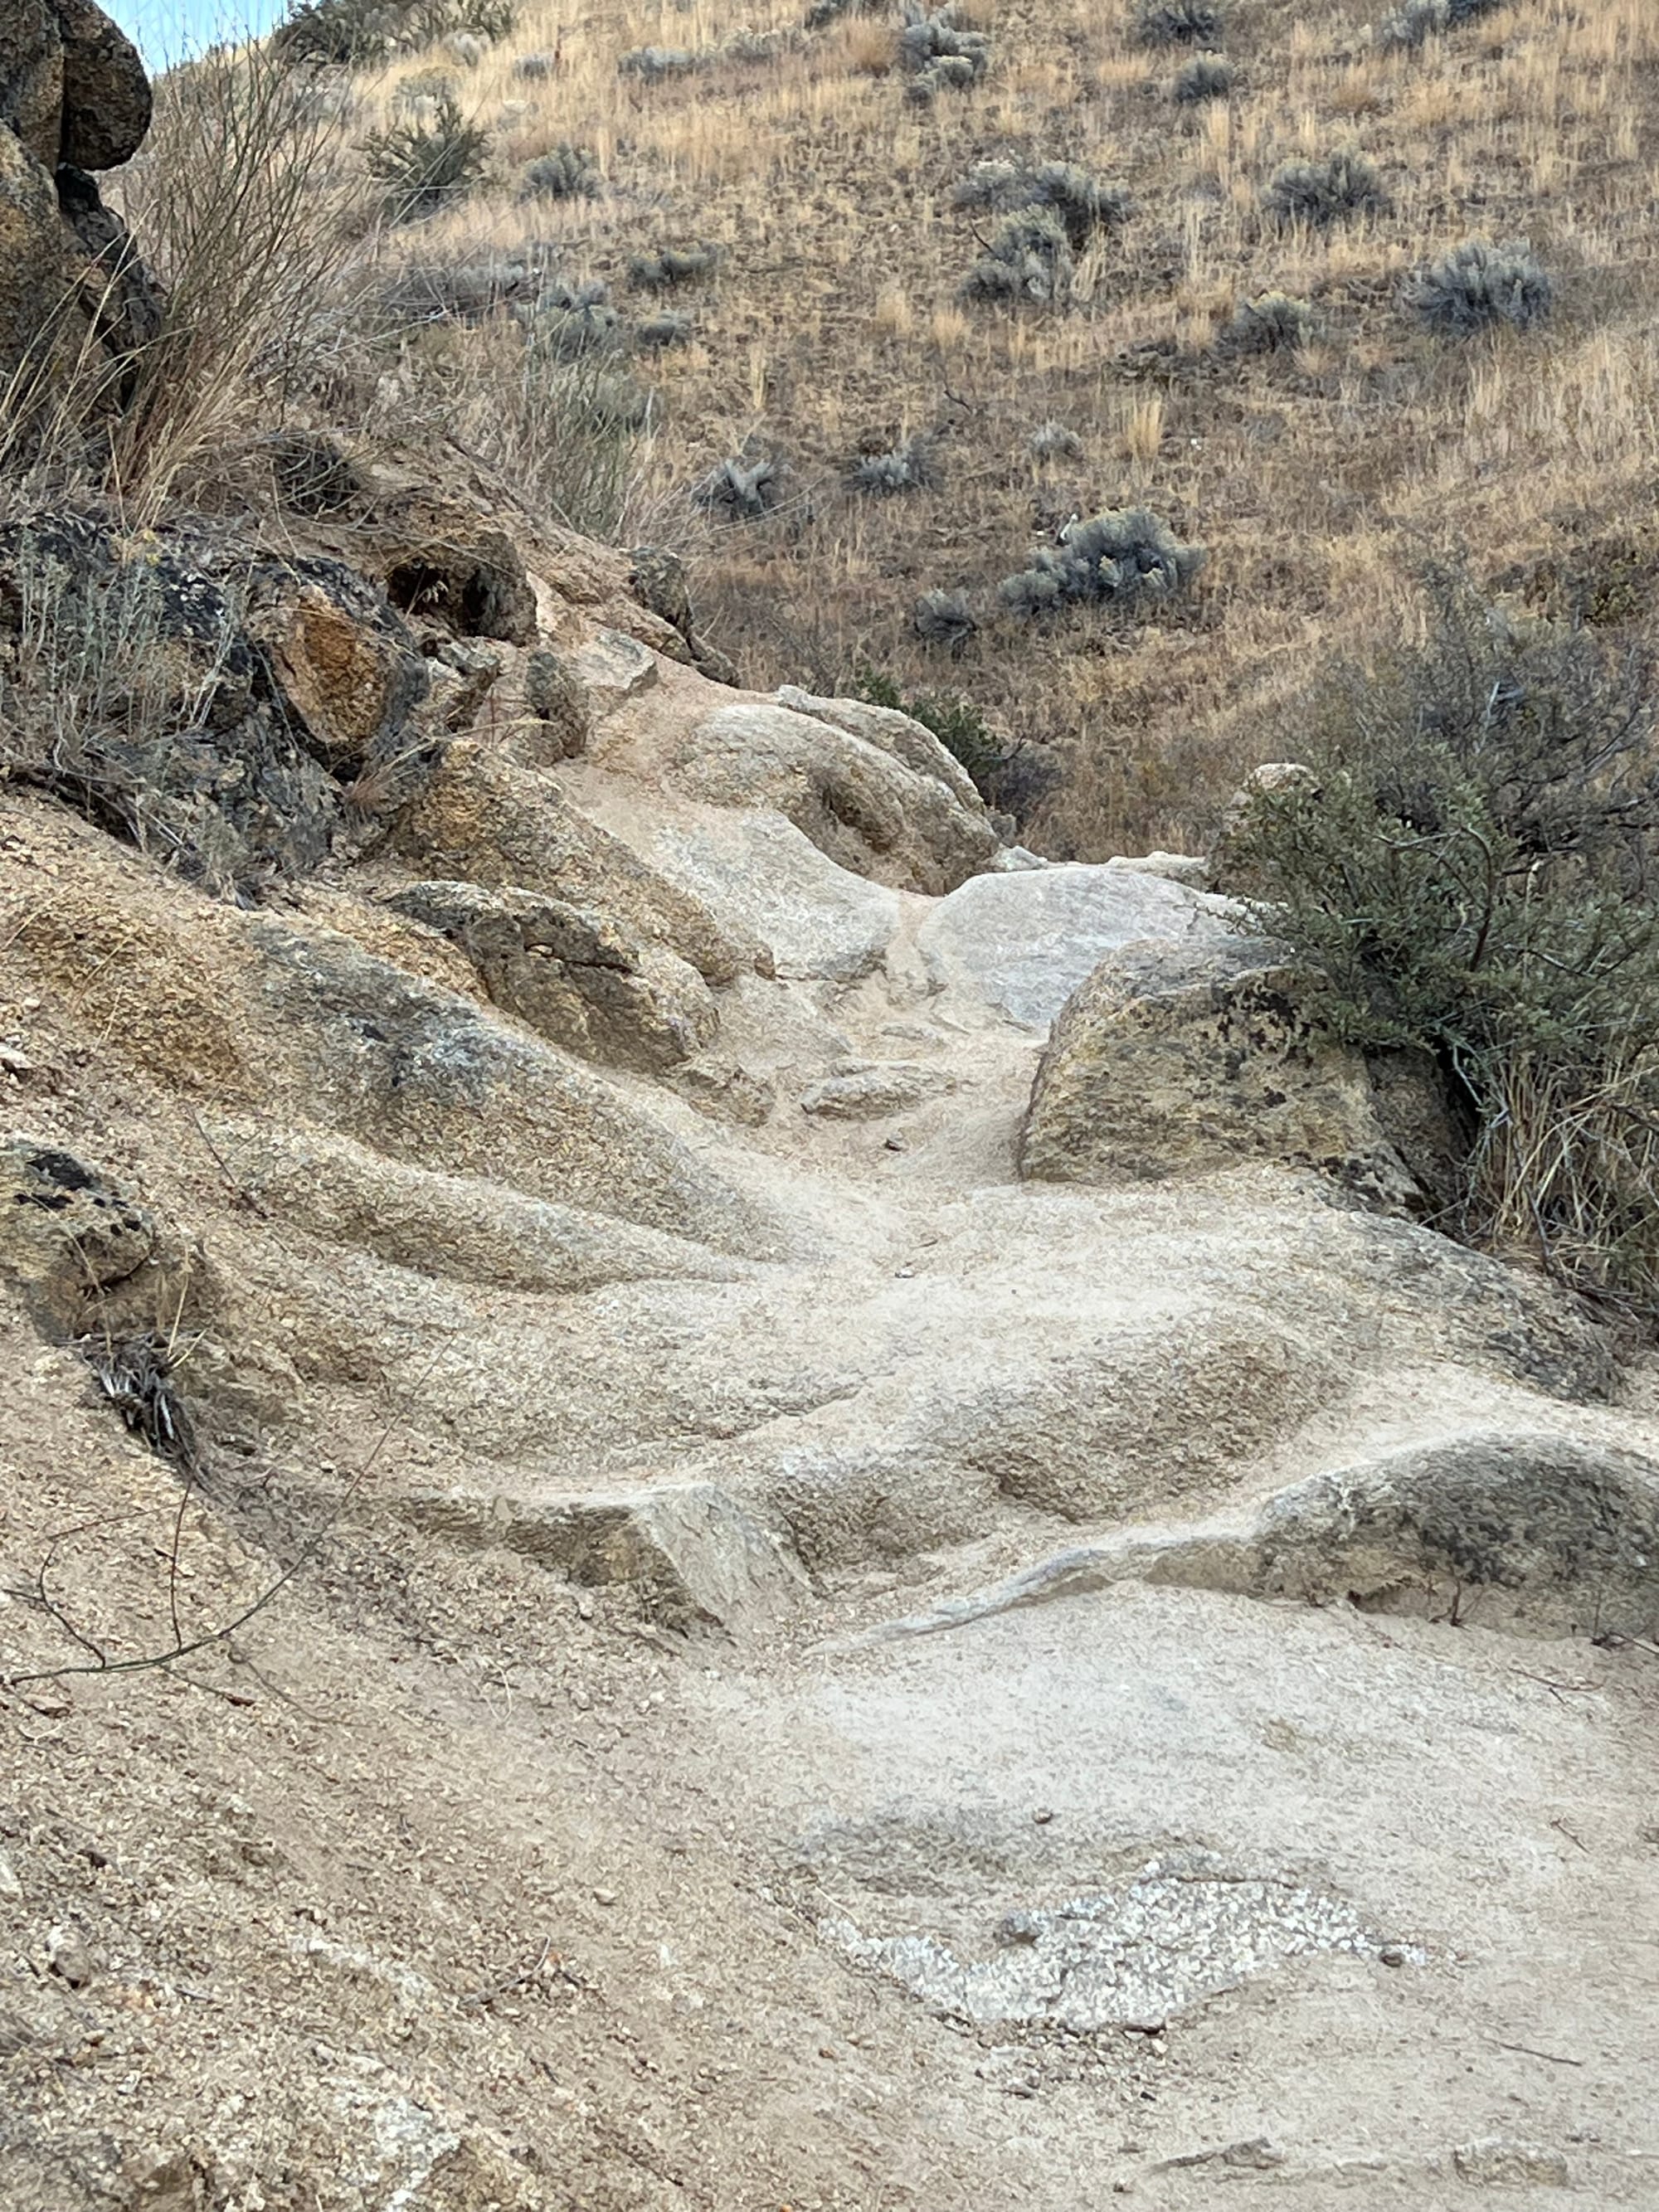
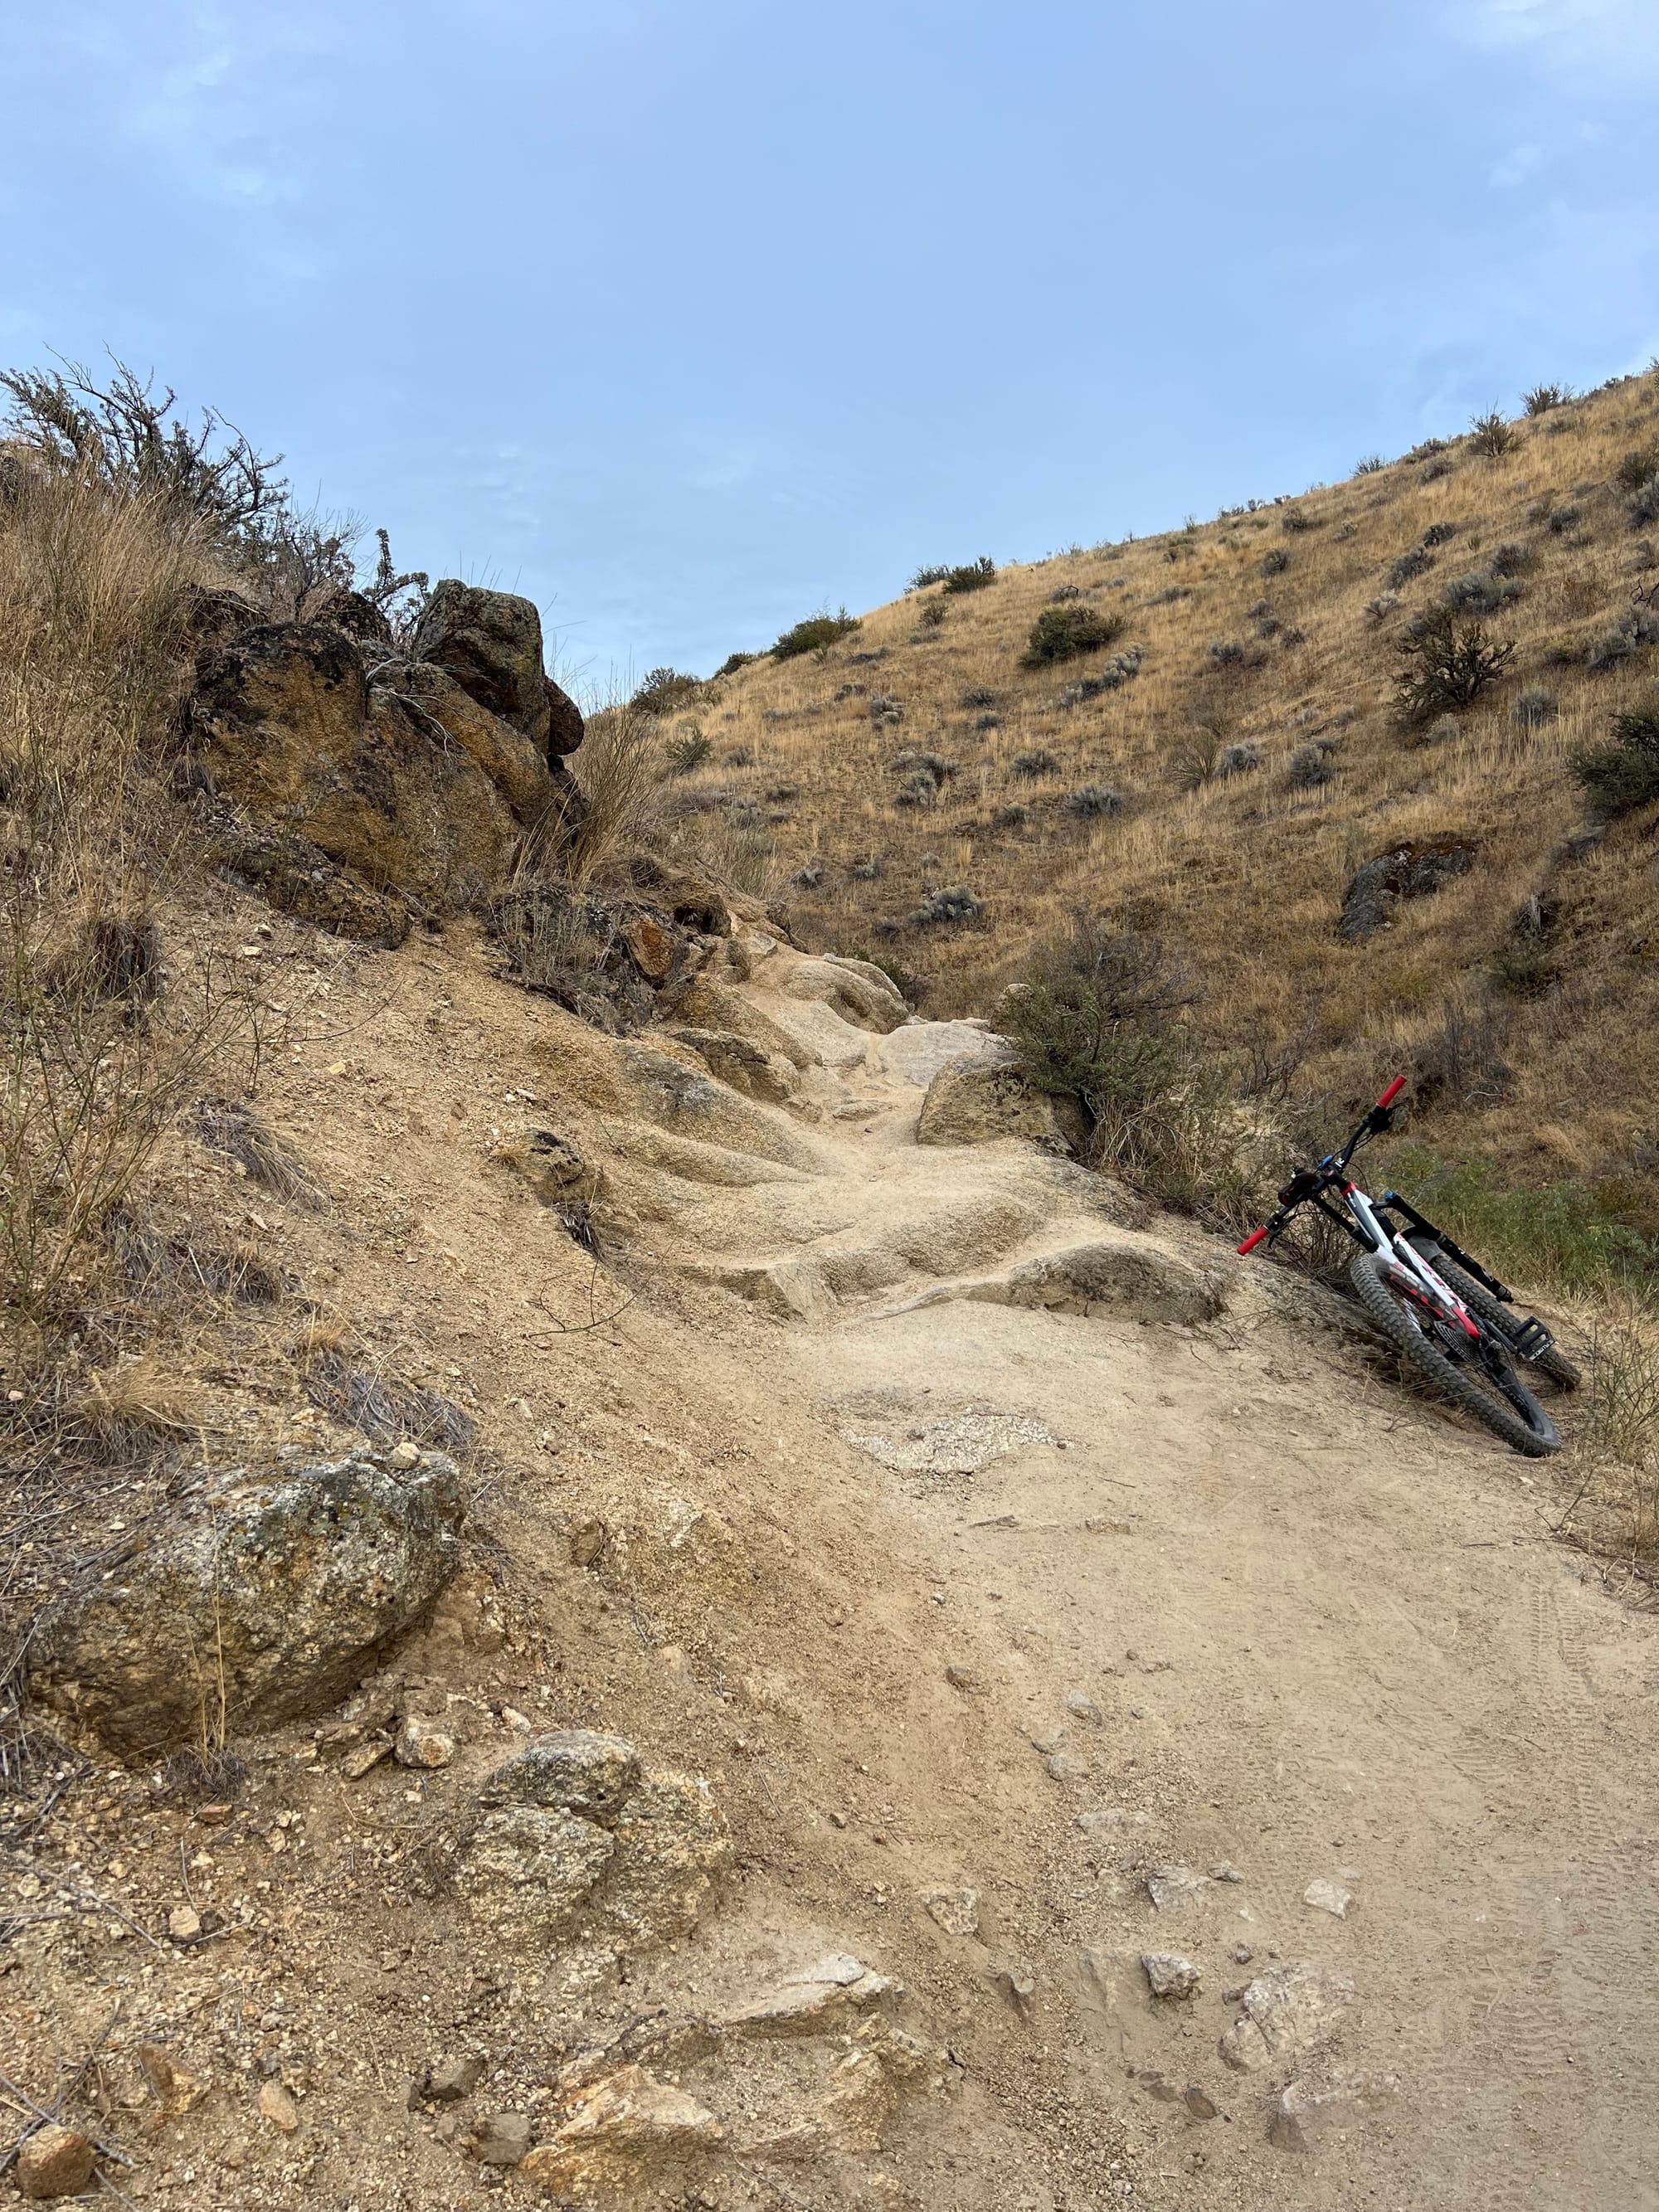
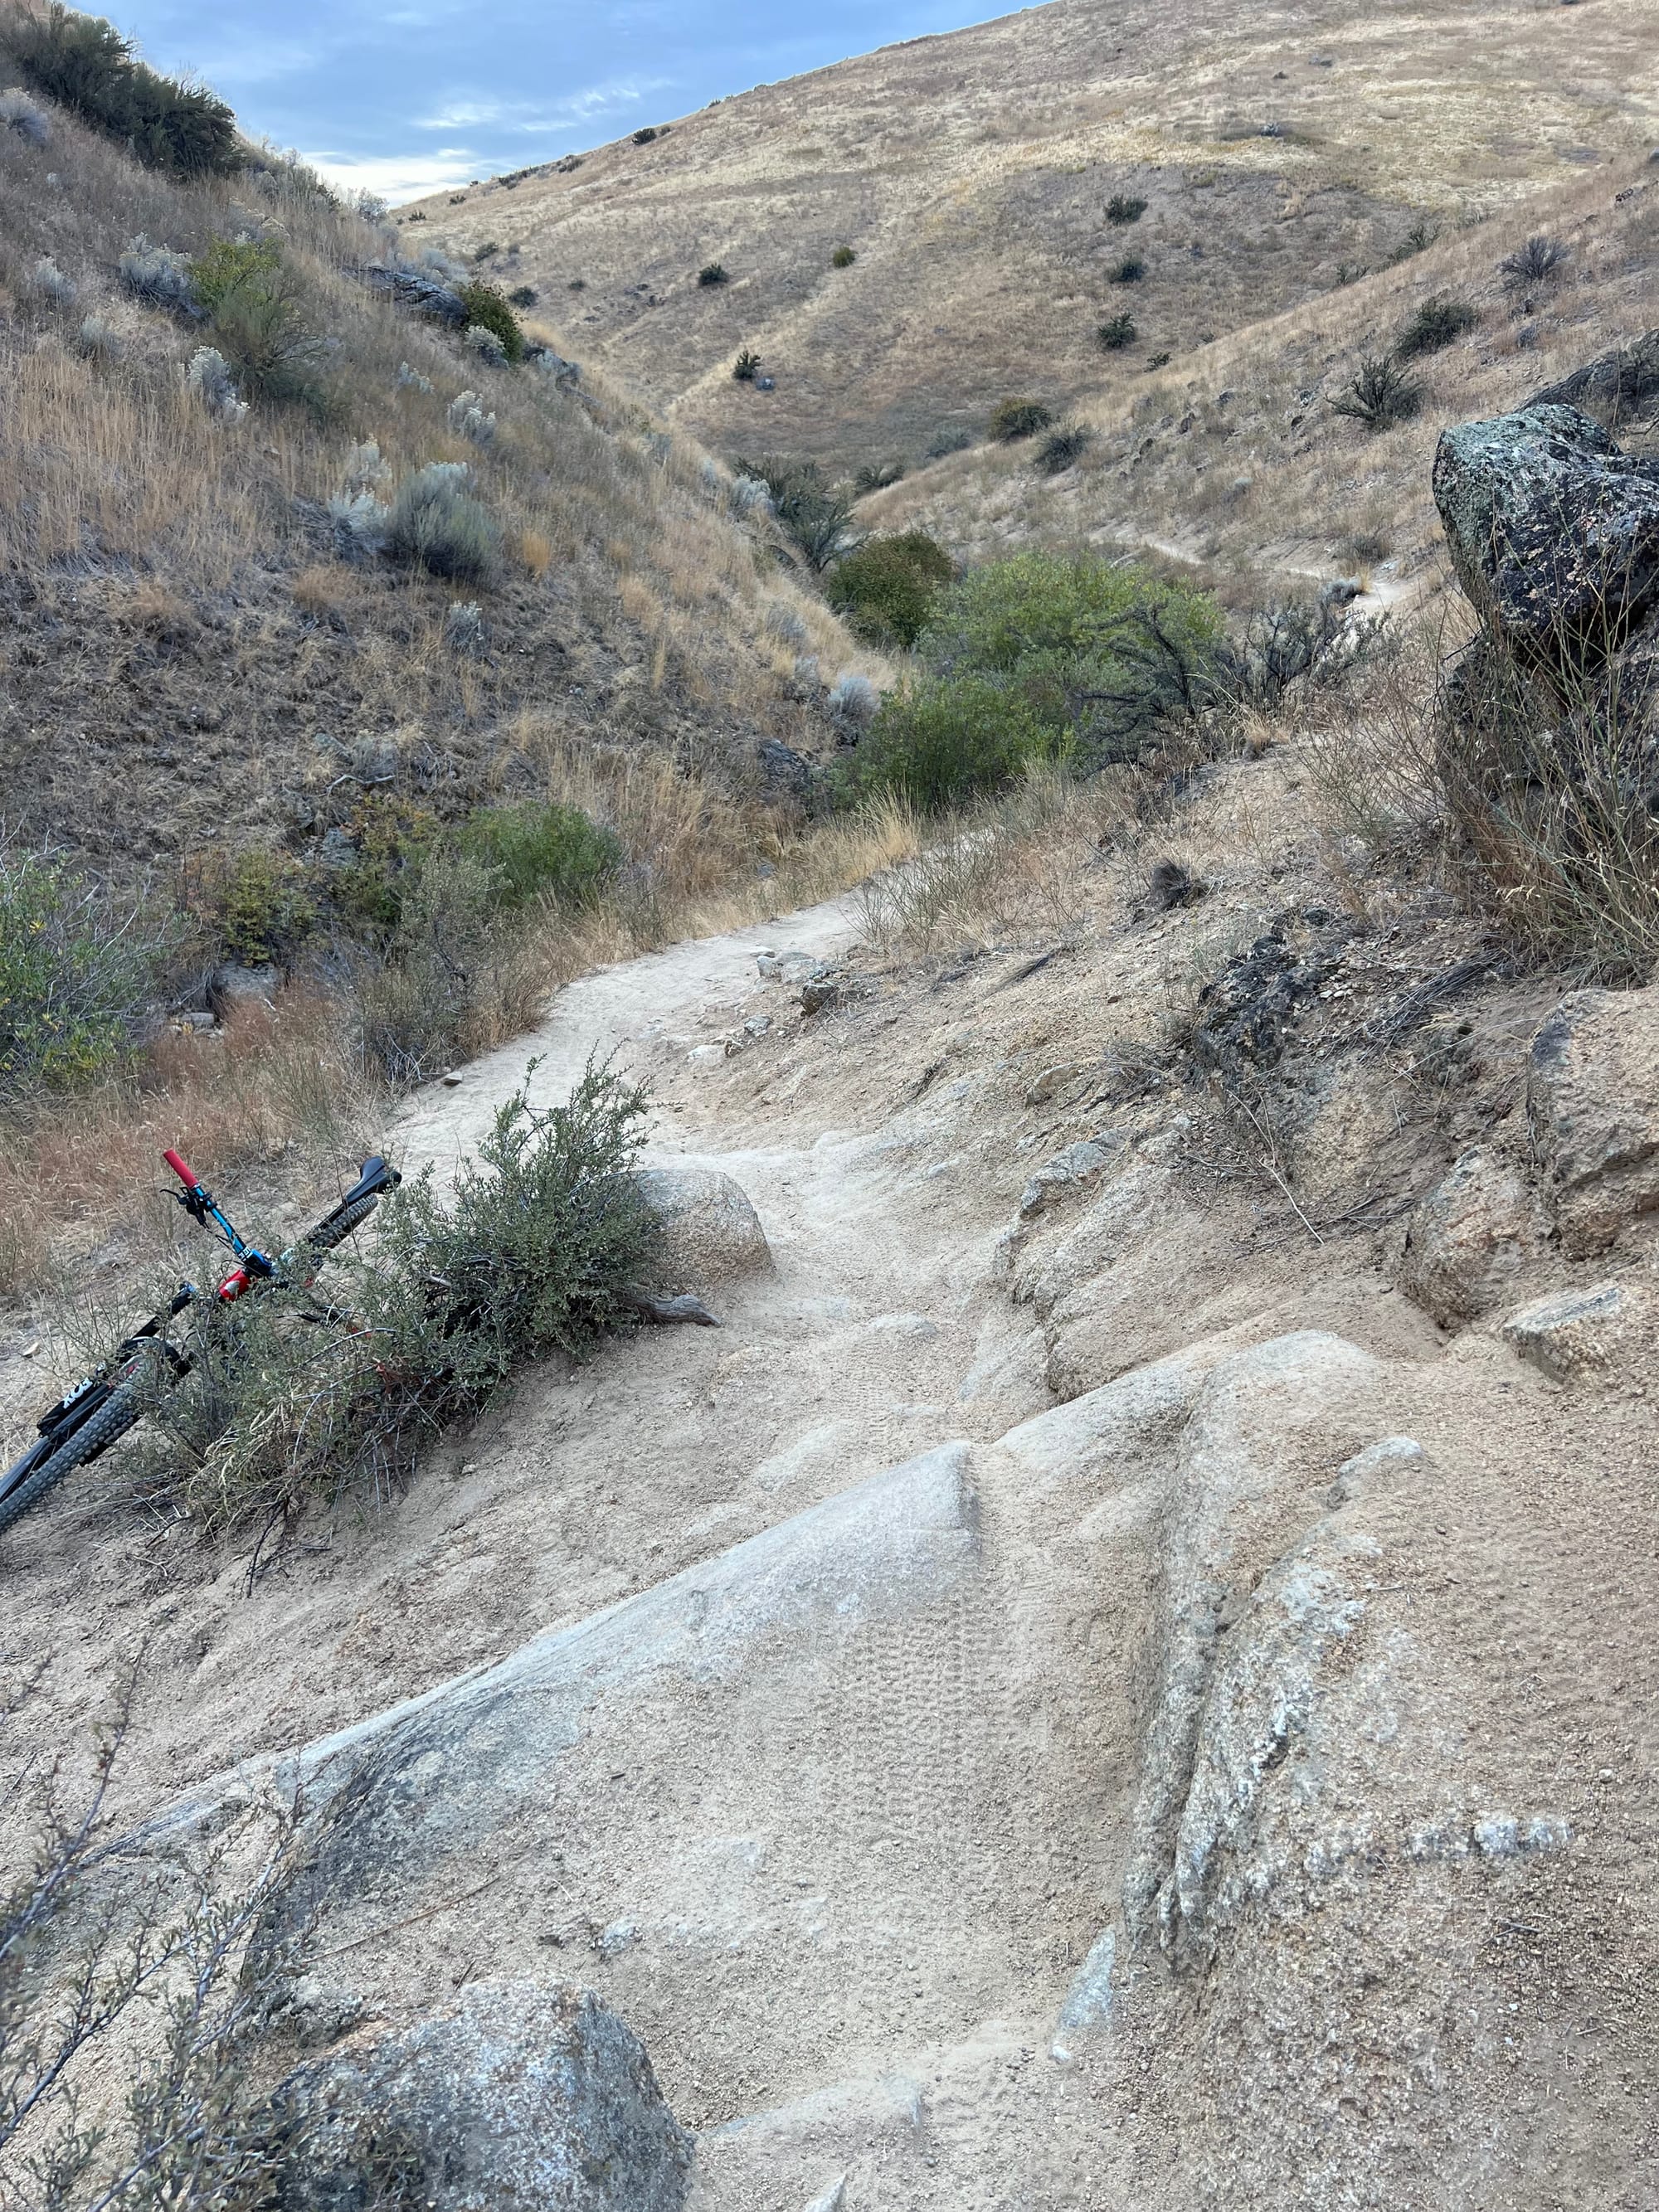
The trick here is to stay smooth with your brakes as you ease over it, no panic grabs! Let gravity take over, and you’ll roll right down into the next corner, ready for what's next. Once you know it’s there, this feature adds some flow to the trail that’ll keep you coming back.

High line on the left, low line on the right
Again, I’ve added GoPro footage for another look.
Feature Breakdown: Rock Island
Rock Island is where things get chunky and fun! This section brings you into a bumpy descent, leading to a left corner, and just as you pass through the creek, you’ll see a split line rock feature. Keeping your speed in check is key on the approach, smooth braking and a steady flow through the creek will set you up perfectly.
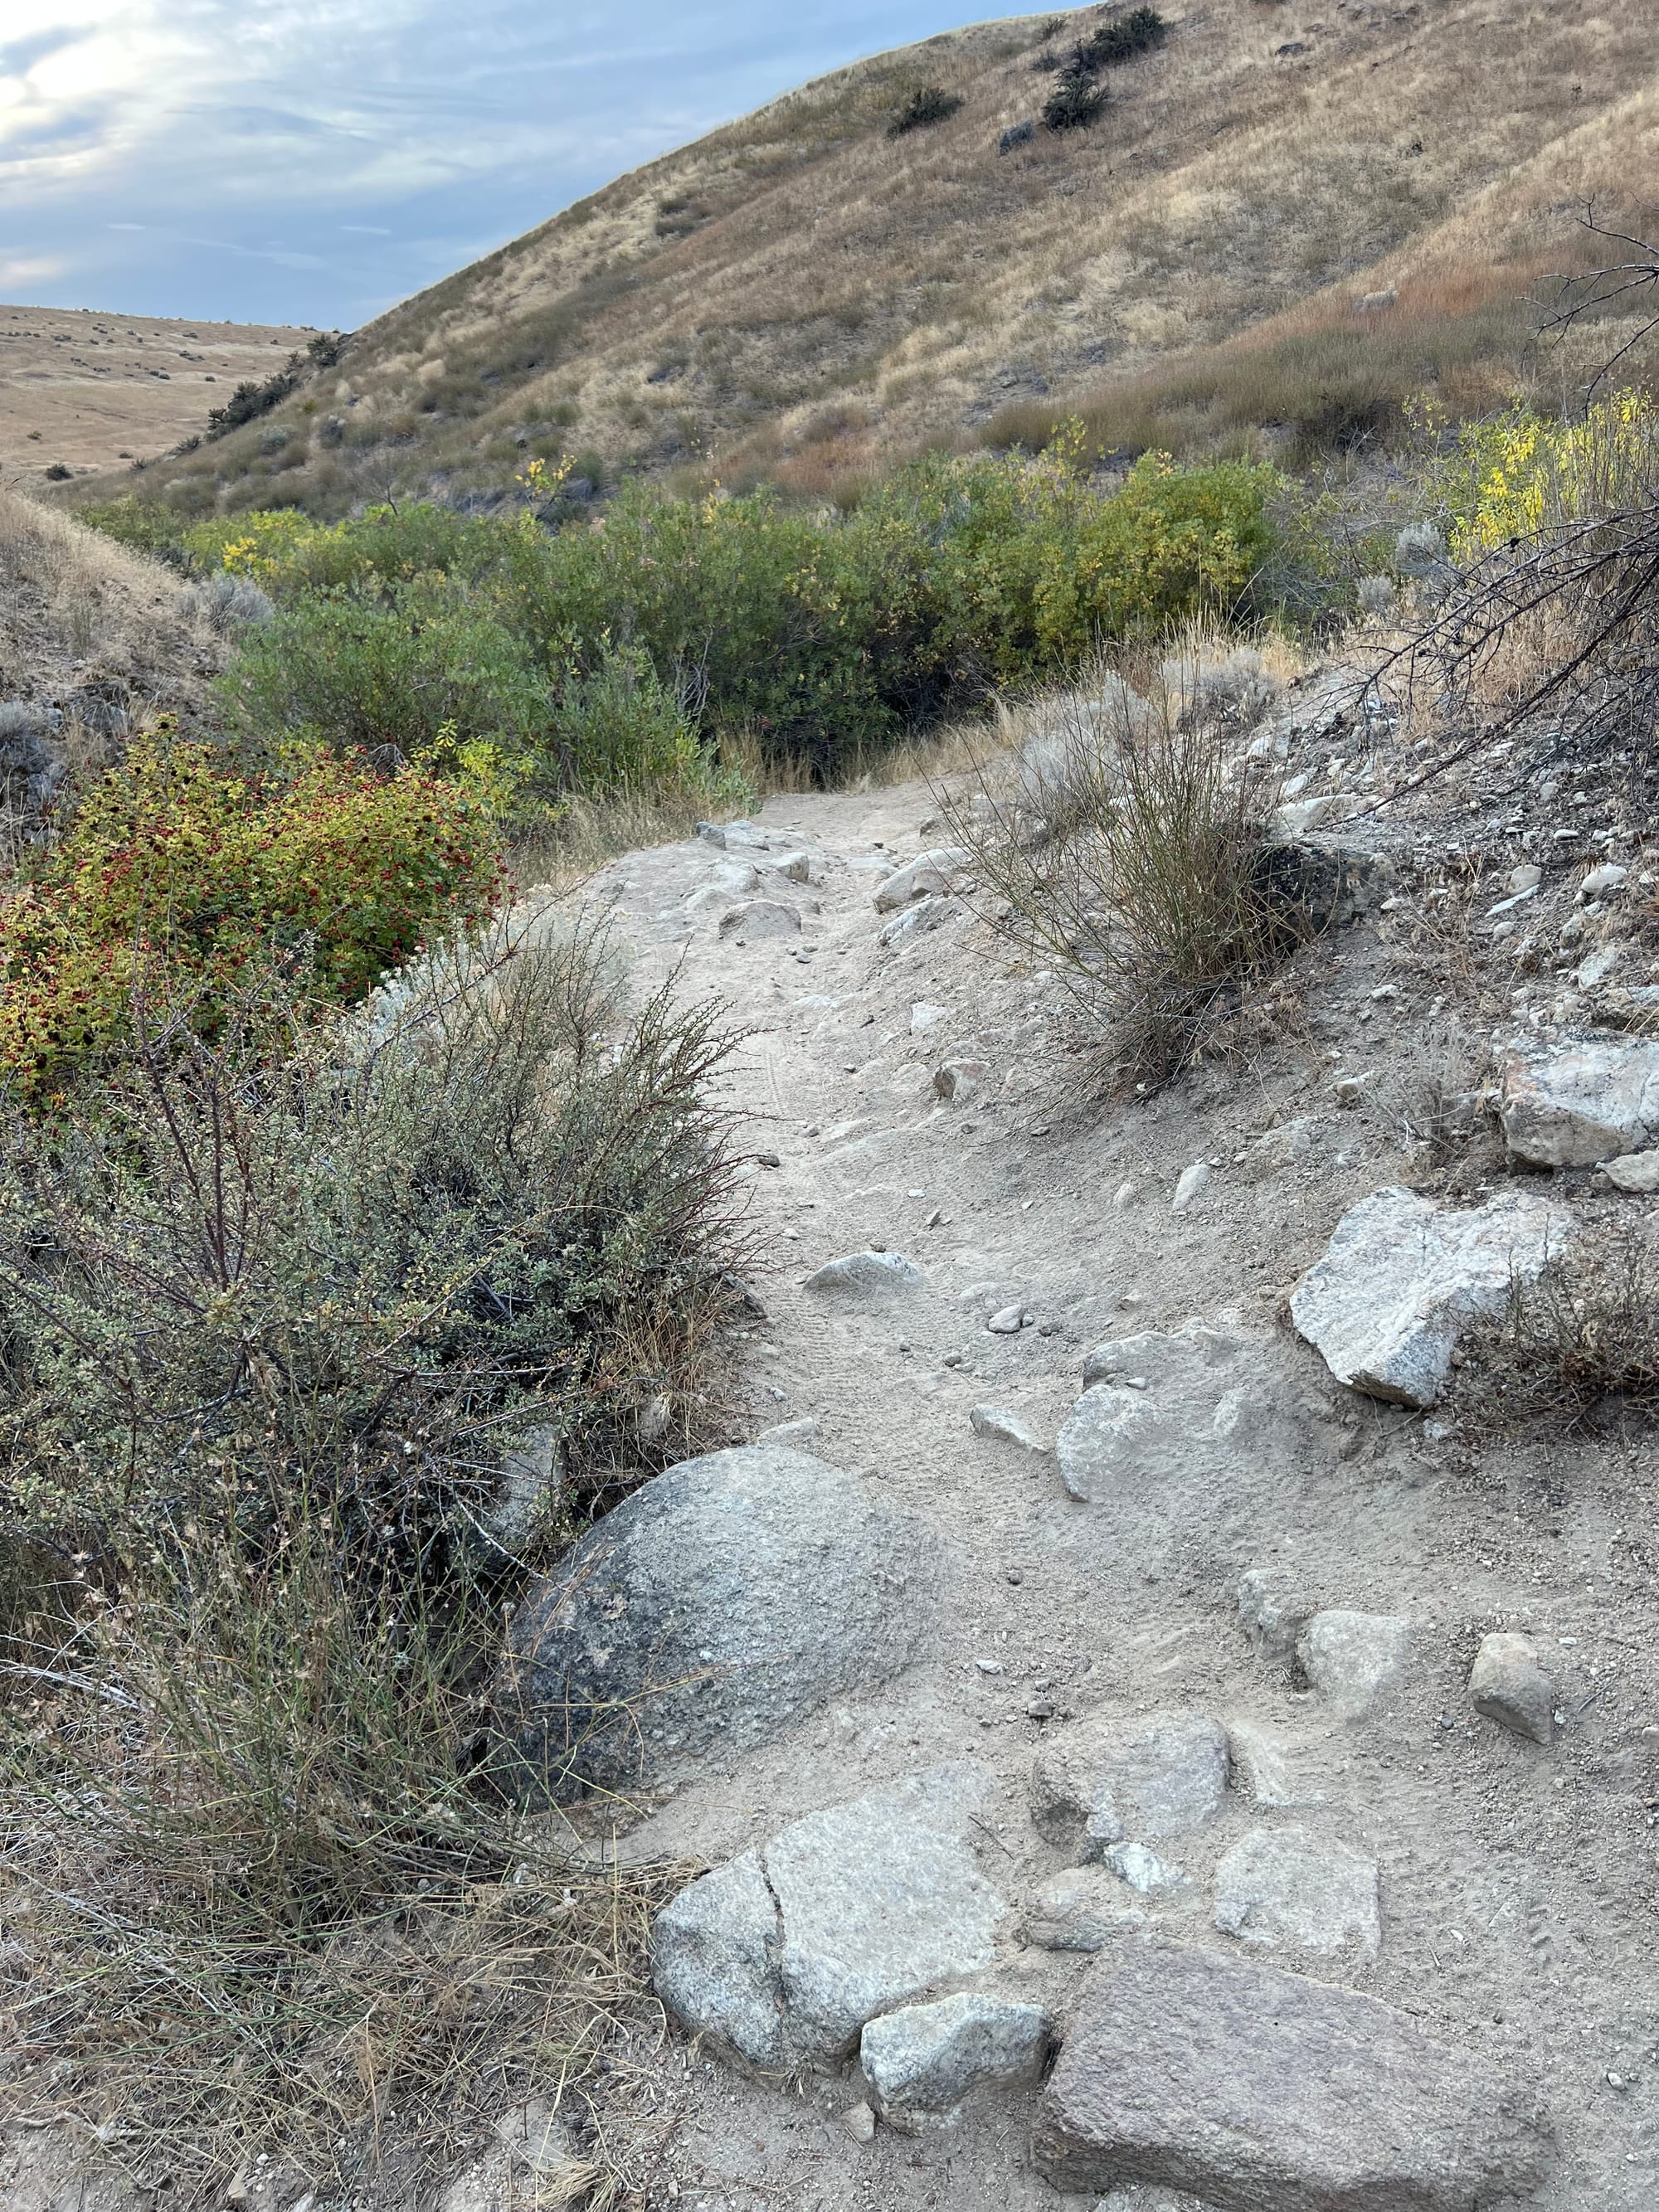
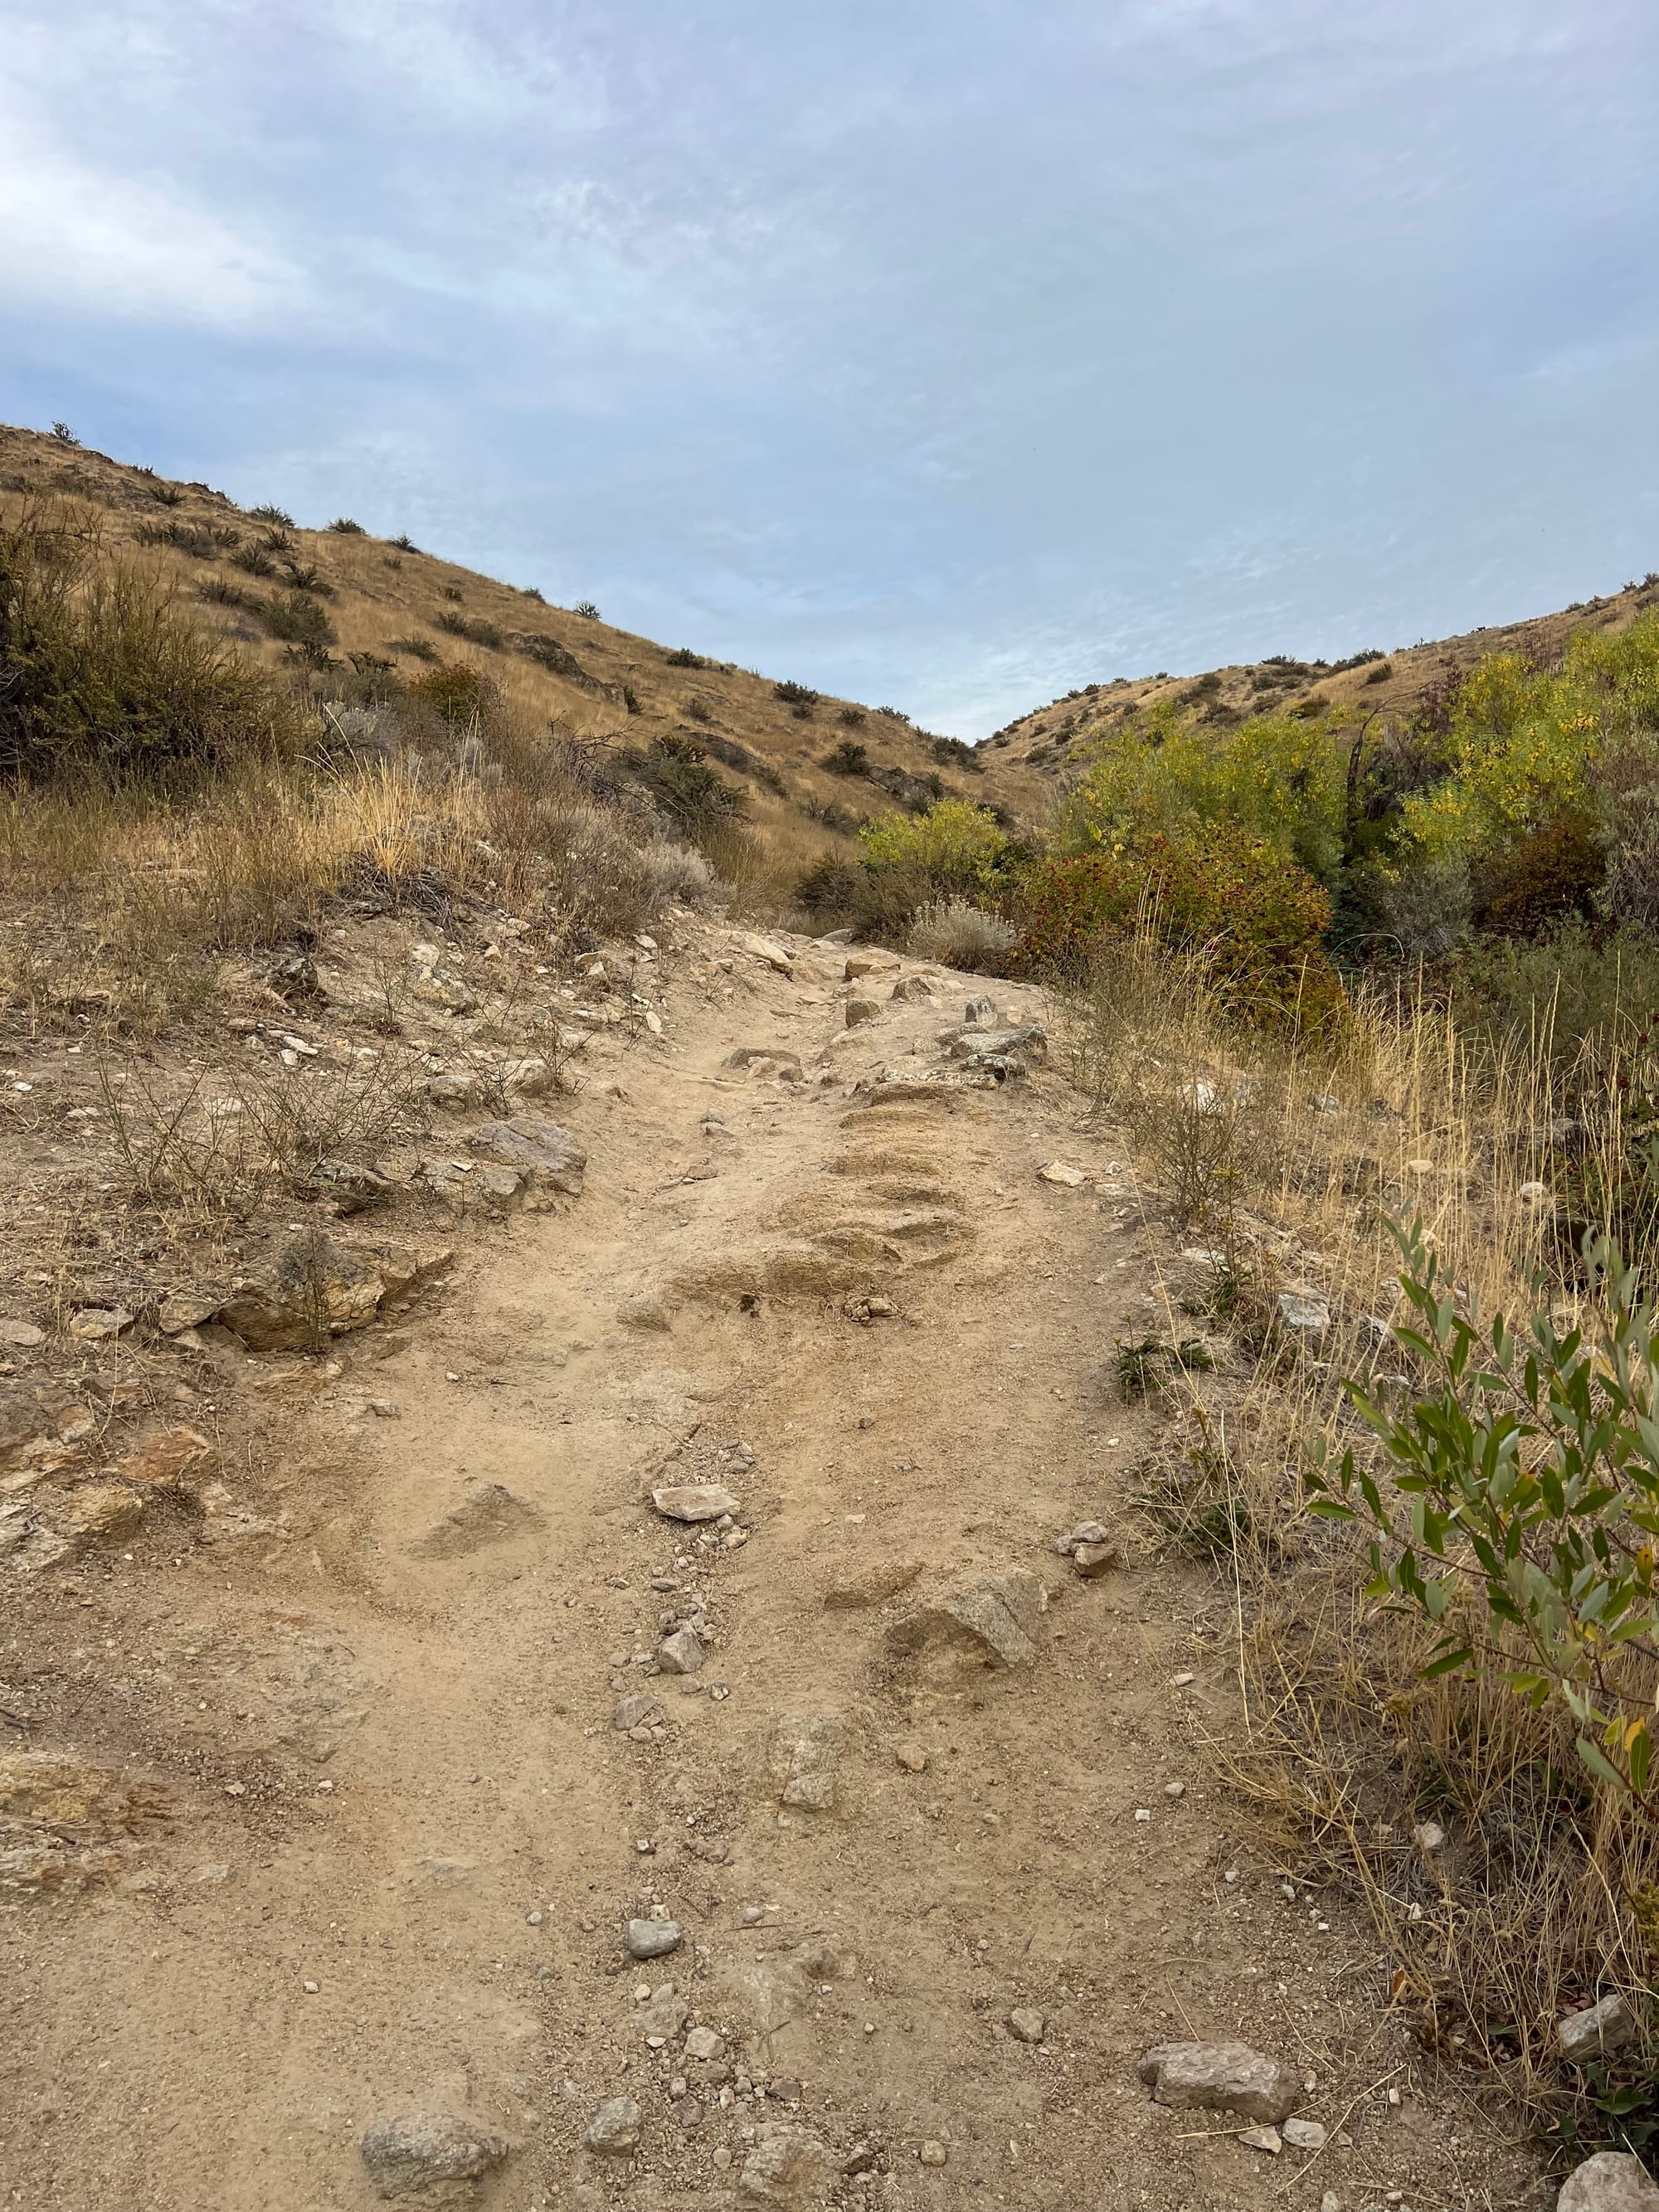
Rock island headed down to the rock feature after the creek.
When it comes to the split lines on this rock, both options have their perks, but you’ll need to commit to one a bit blindly. The natural flow—and often the faster choice—is to take the left, high line. With a few pedal strokes, you’ll power right over the rock feature and keep your speed up.

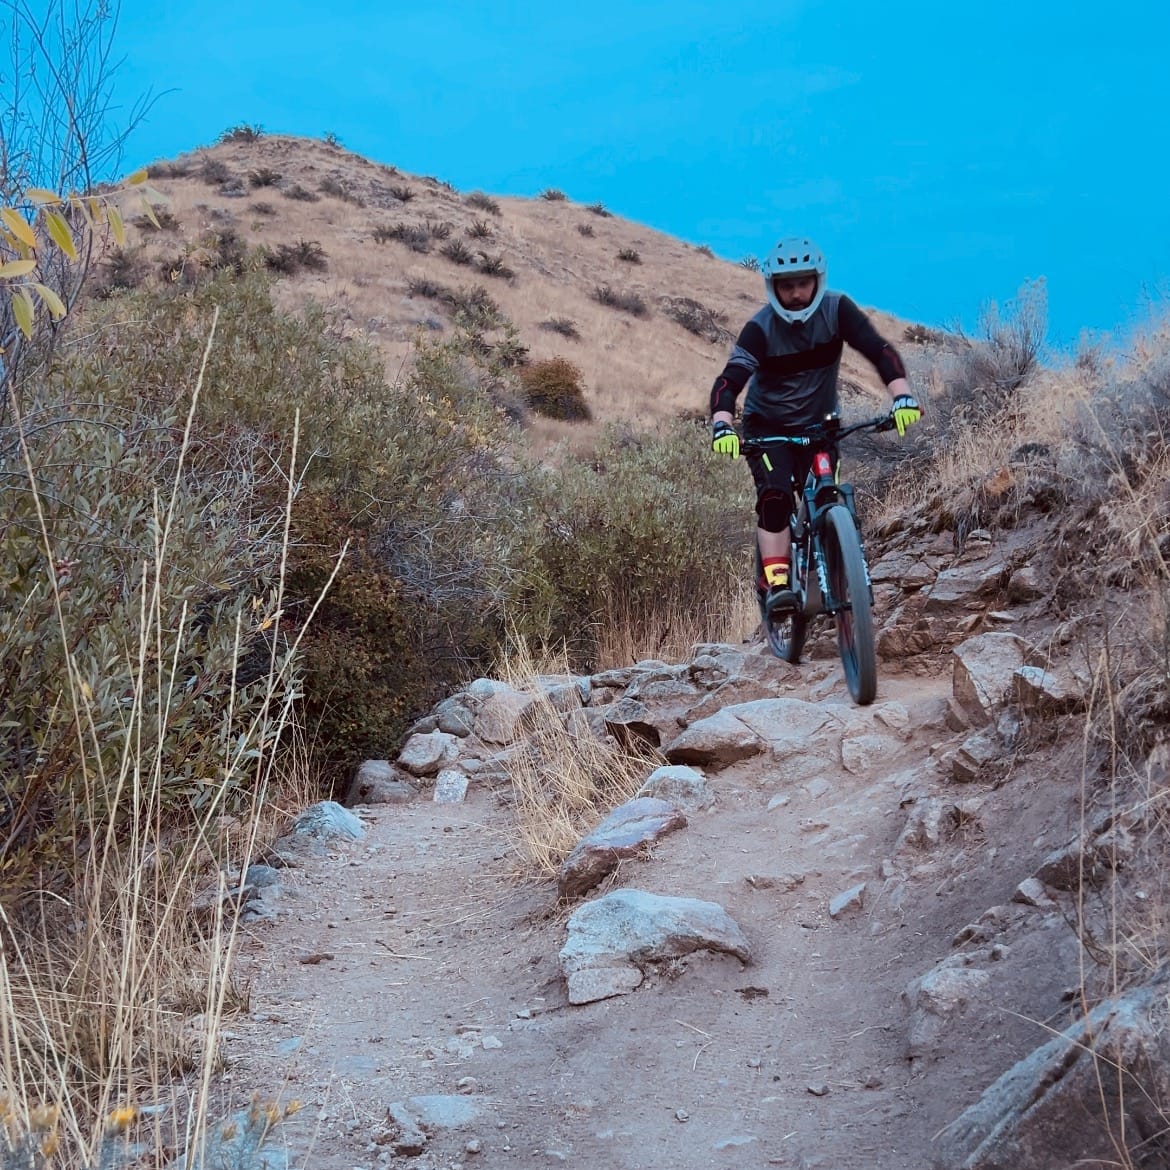
On the right side, the low line offers a small, rollable drop that adds a little spice. Just know that it’s tough to spot in advance due to the creekside brush, so if you’re not familiar with it, the low line might sneak up on you.
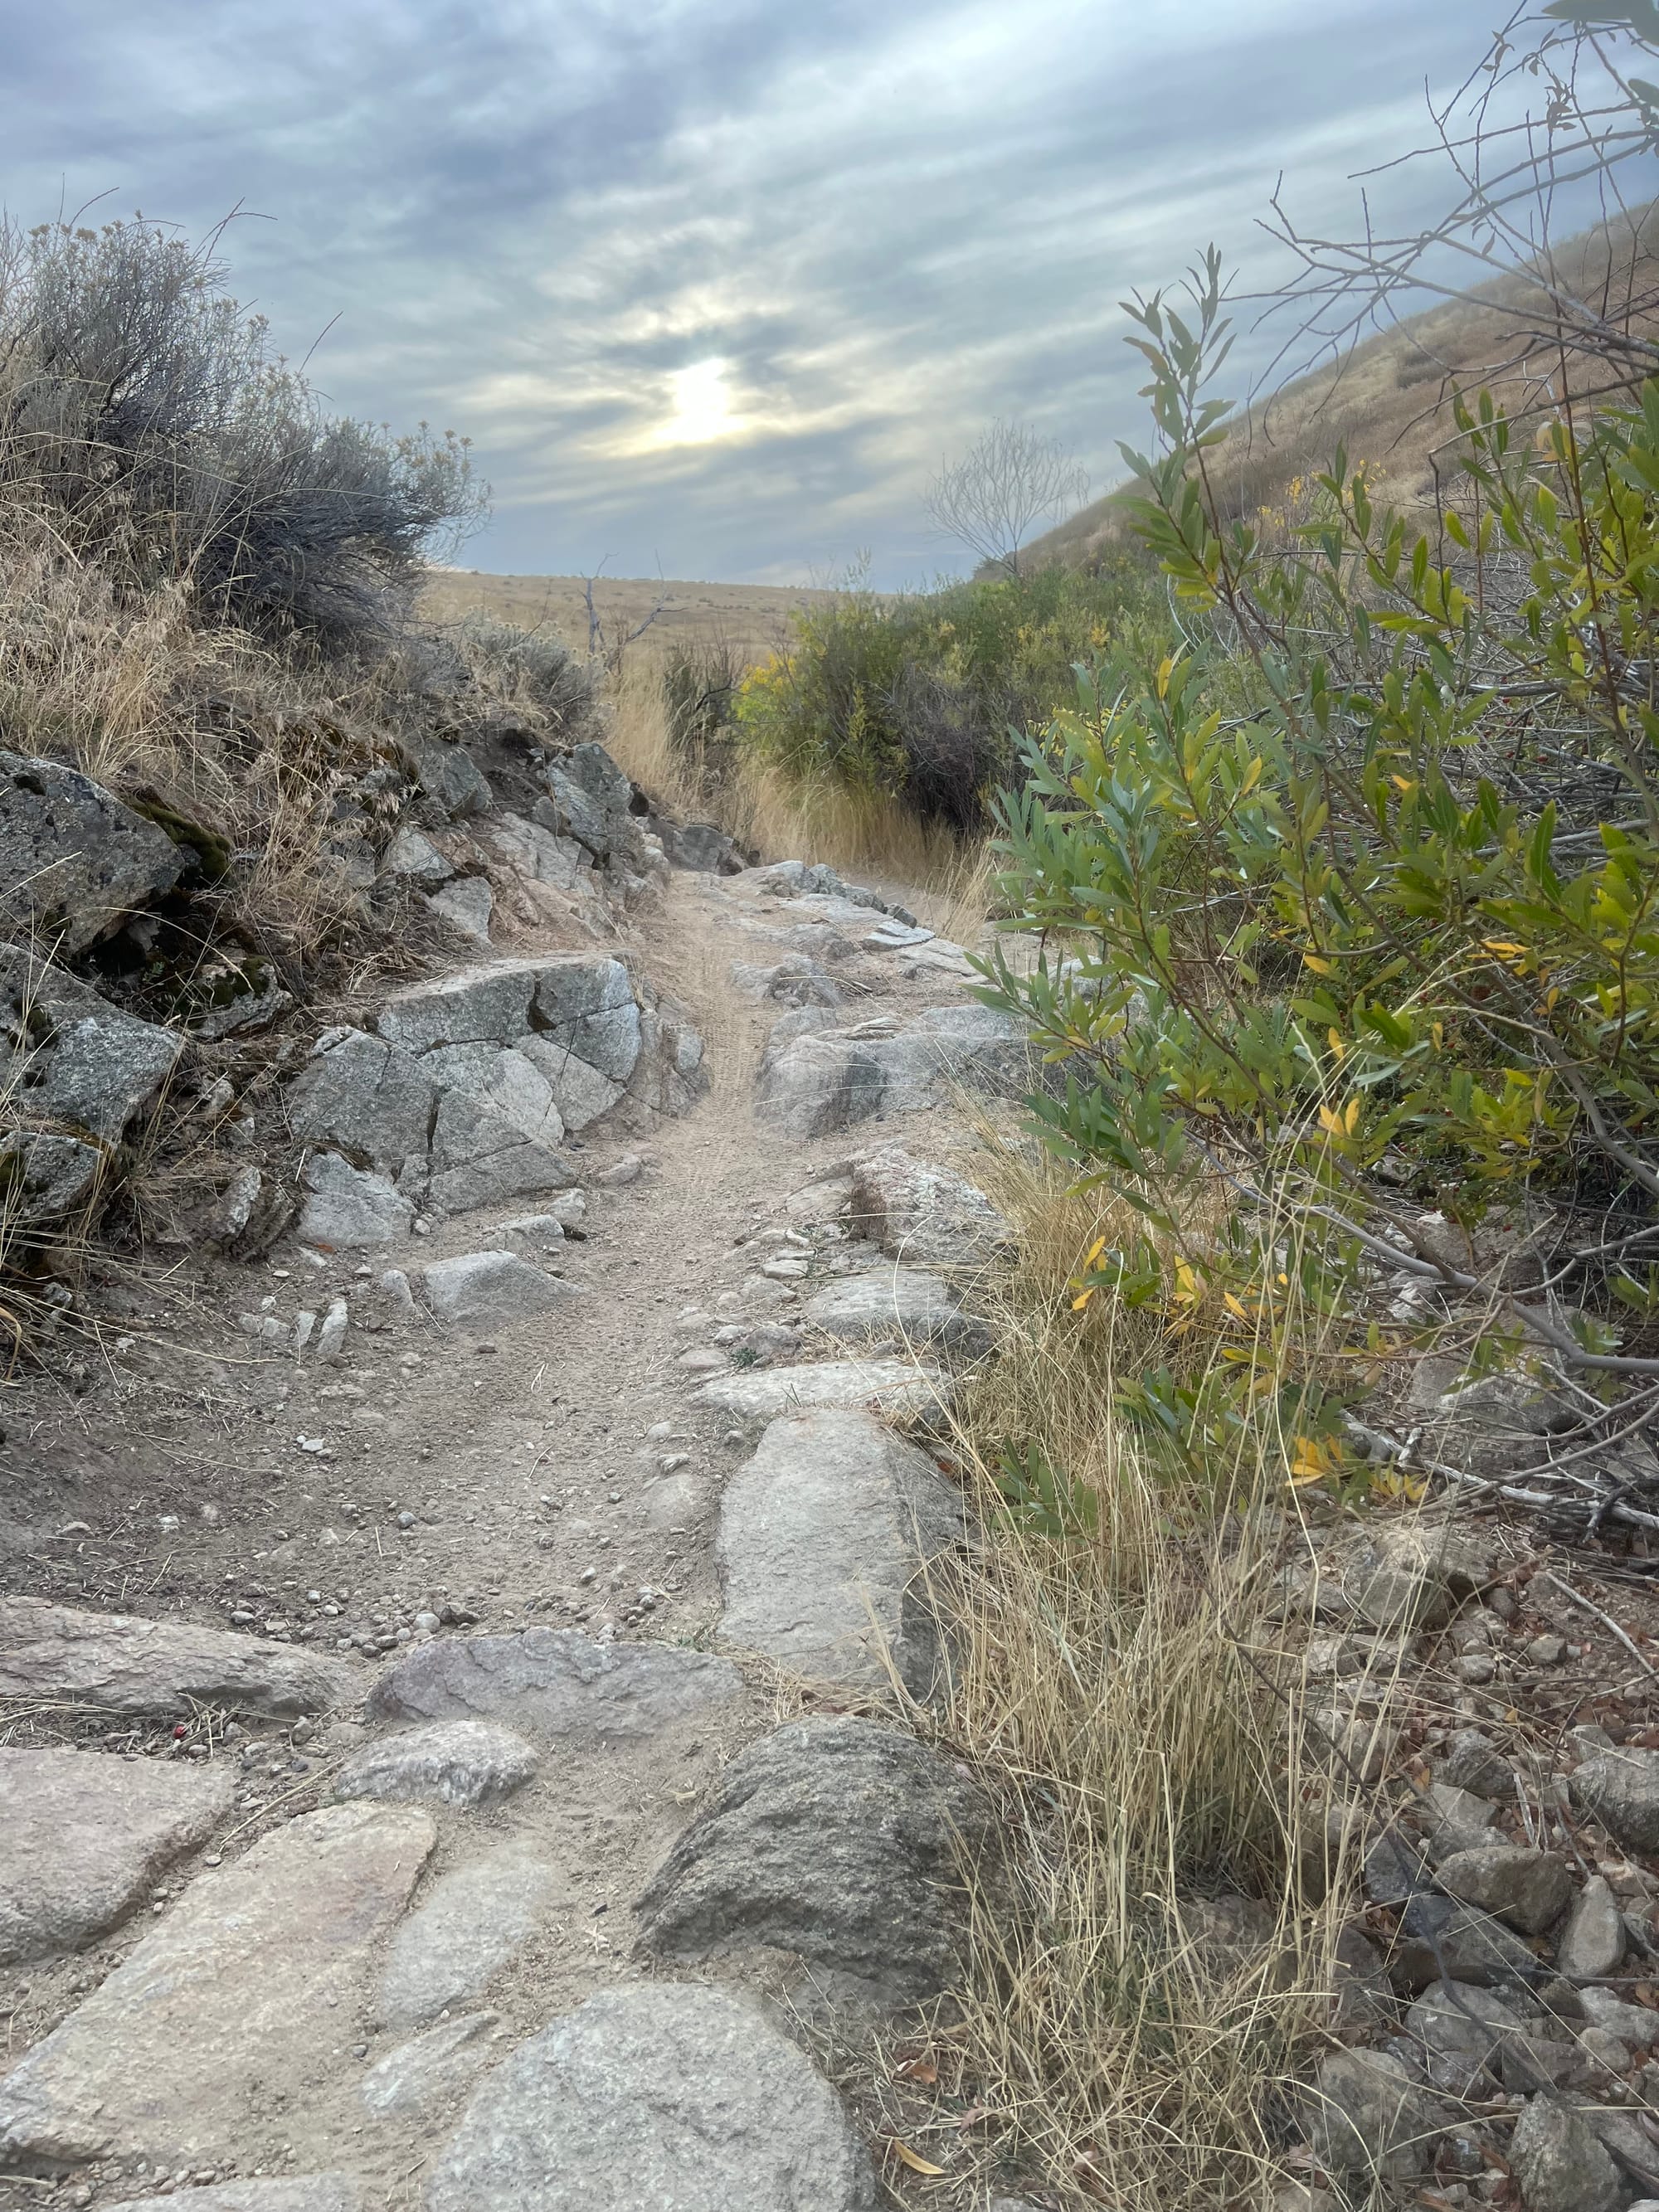
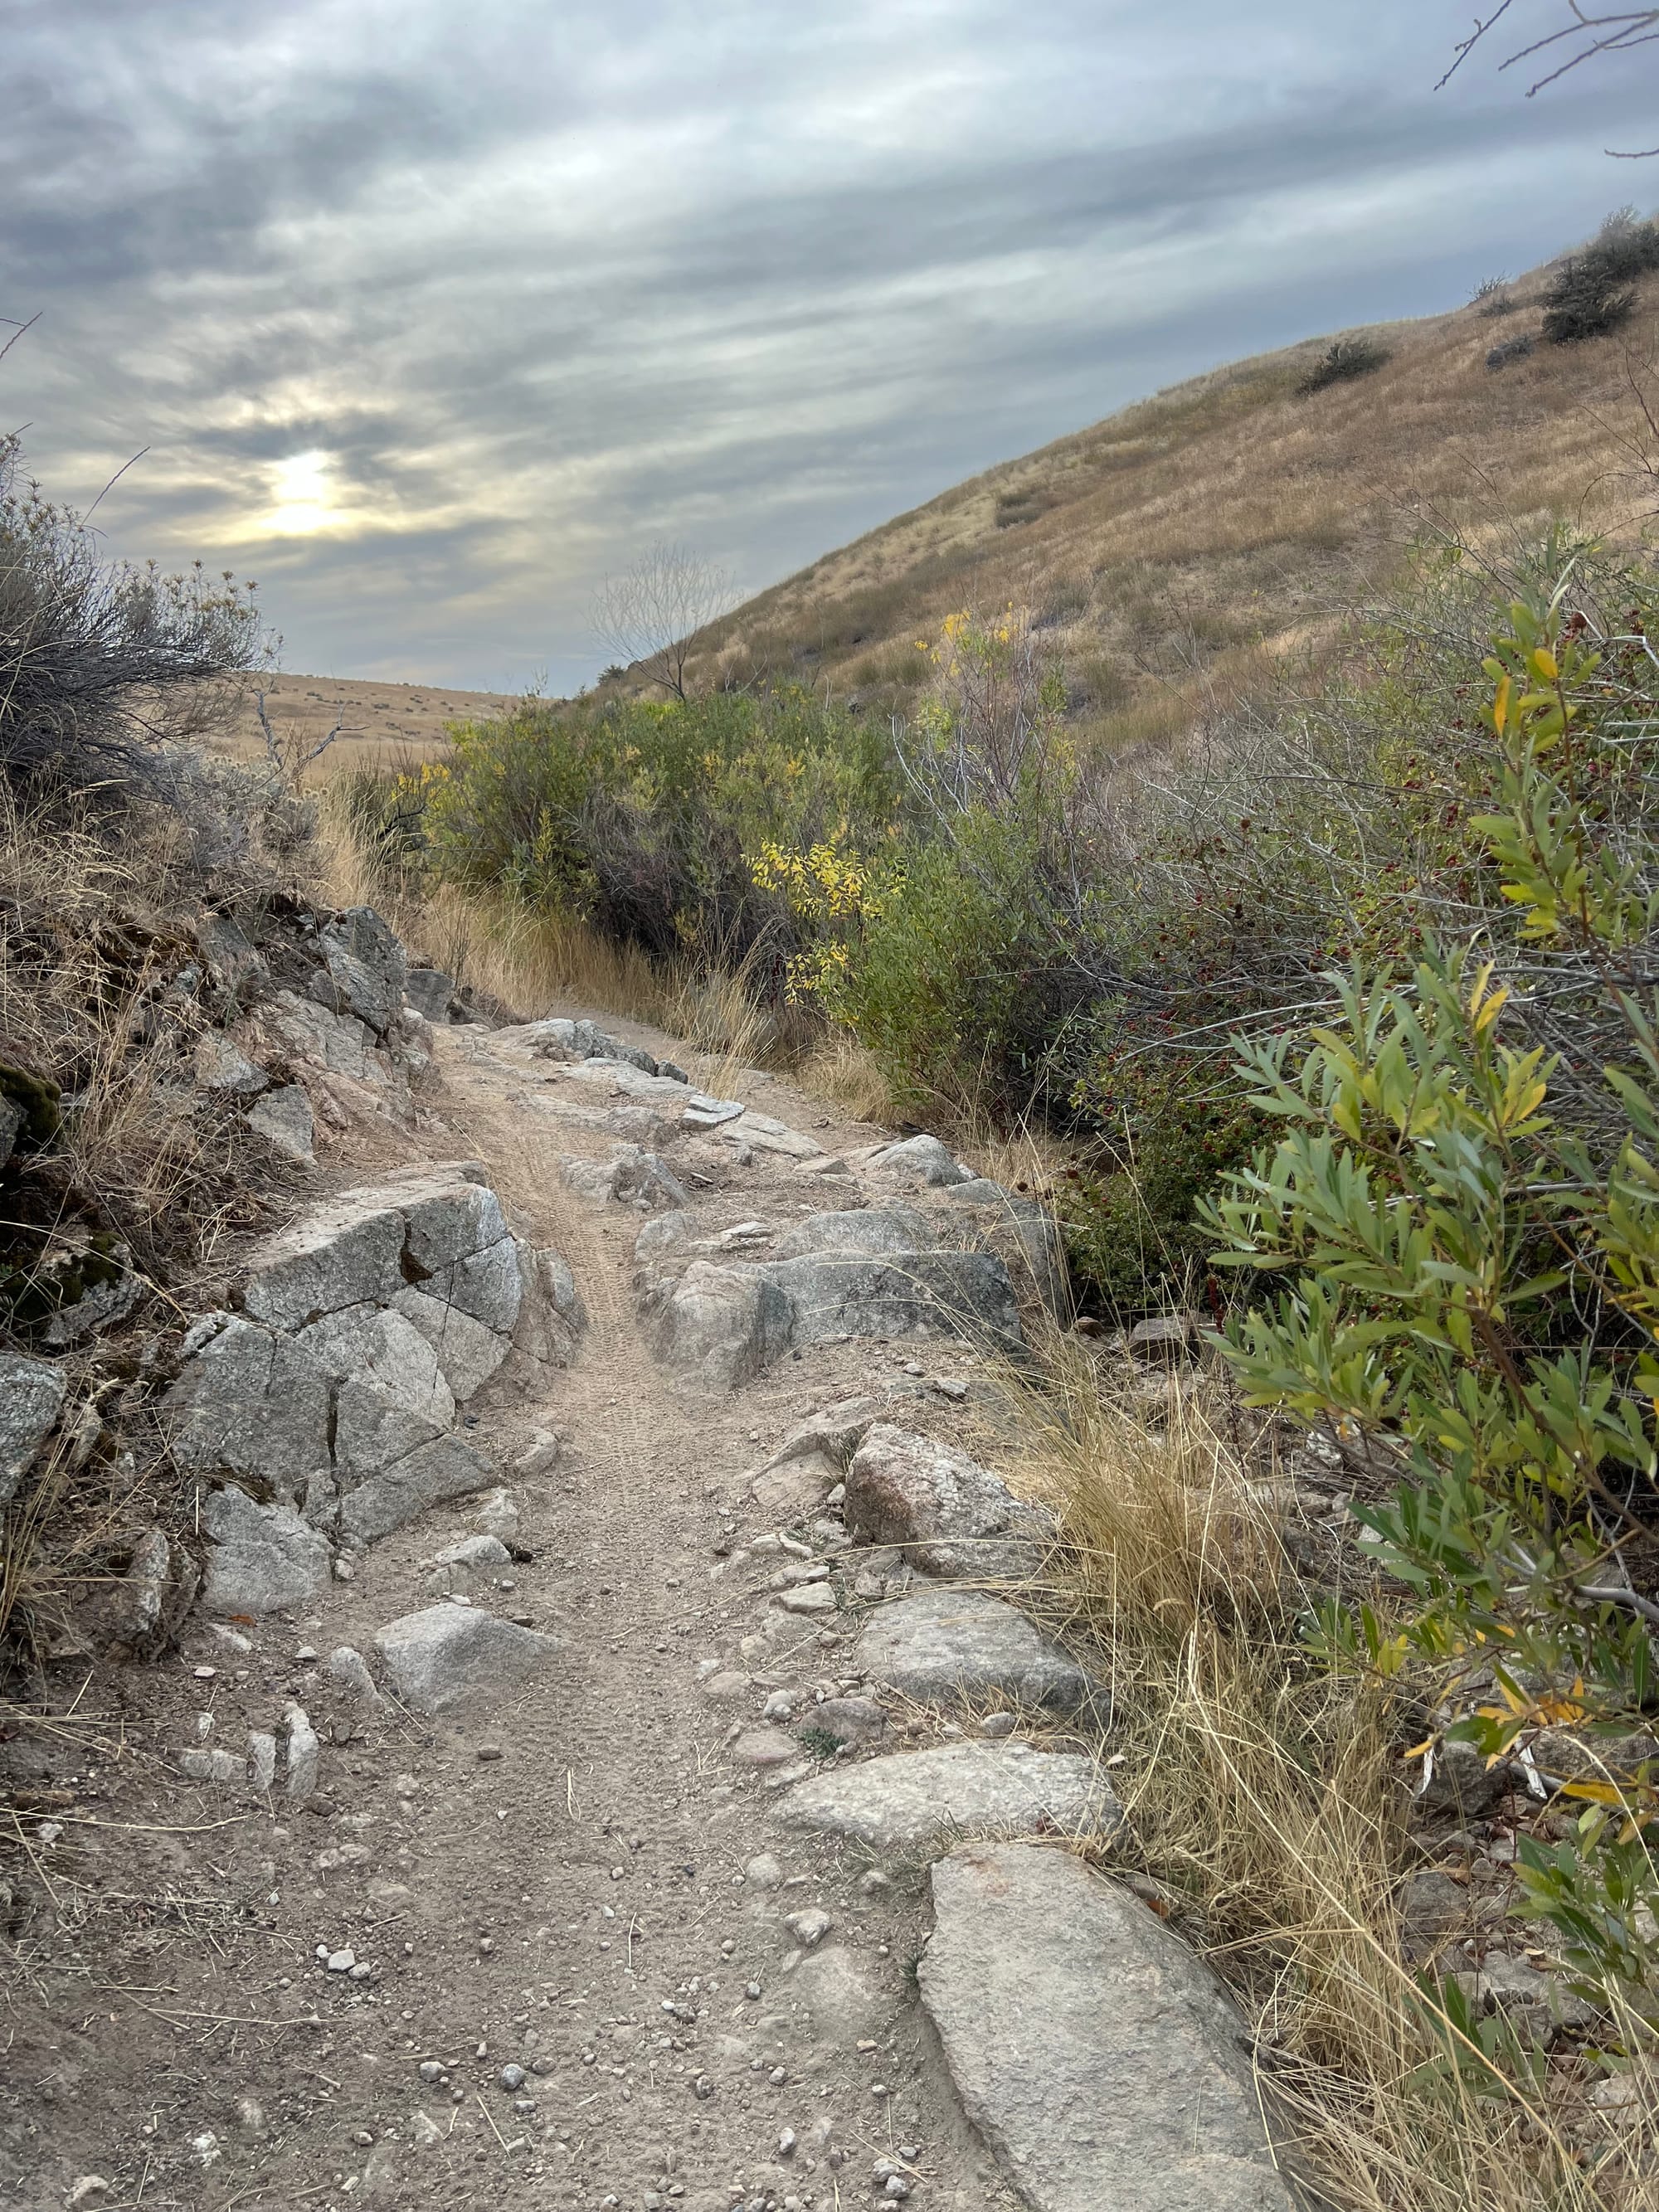
The bush here blocks the inside line, you can see the main line that drifts left.
Rock Island is hands down one of my favorite sections on Bob’s. It’s technical, it’s unique, and it’s always a highlight of the ride! Check out the GoPro footag below to get a feel for the lines and pick out your next route.
Feature Breakdown: The Cruise to the Dam
After Rock Island, you get a well-earned breather as the trail opens up! This section is mostly smooth and lets you pick up some speed, but don’t get too comfortable, there’s still a small, manageable switchback waiting for you as you approach the creek crossing. The switchback drops you right down into the creek, so keep it smooth, especially if it’s been a dry day and the dirt’s loose.
A quick heads-up: hikers frequent this area, so watch your speeds and keep an eye out as you cruise toward the concrete bench and 8th street connector trail. This spot is a great place to pause, maybe do another loop up 8th street connector, or catch your breathe for the last stretch down to your parked car!
The Creek Section: Rock & Roll to the Lot
From the concrete bench, the trail dives straight into what I like to call The Creek section. This final stretch runs about 0.4 miles, weaving through chunky river rocks and a few twisty blind corners, so you’ll want to keep your speed in check. The loose, round rocks add an extra bit of fun, making this part a blast if you’re into a more technical descent.
Along the way, there are a couple of fun little rock drops and bump jumps—perfect spots to play around if you’re feeling the flow! Just remember, it’s all downhill to the parking lot from here, so enjoy the last bit of trail with a mix of smooth control and a bit of playful line choice.
And there you have it, Bob's Trail, top to bottom!
Whether you're out here to test your skills on those rock features or just to soak in the Boise foothills vibes, this trail brings plenty of fun packed into its short 1.6 miles. Remember, each feature has its own personality, and the best way to enjoy the trail is to ride it at your own pace. Thanks for joining me on this run-through!
Below is GoPro footage of one of my 2nd time down Bobs Trail. Footage starts from the OHV parking lot and ends at the bottom of Bobs trail.
Hope this guide helps you tackle Bob's Trail with confidence and a smile.
Forever two wheels!
-Myles
Bonus Content for Members
Hey there! For those of you who've joined the Filthy Casual MTB community, I’ve added some extra goodies below. It's just my way of saying thanks for the support! Not a member yet? No worries, you’re still getting the full ride details, but if you ever want a little extra, feel free to join!
Hey, friend!
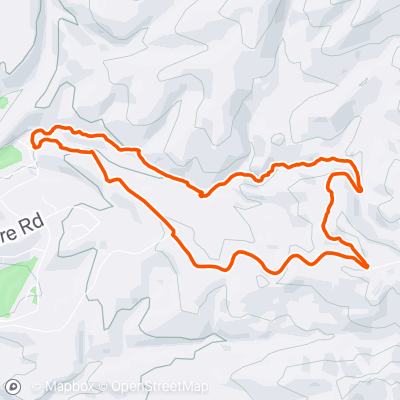
Here, I’m sharing my Strava route and some suggestions for looping Bob’s Trail. Word from R2R is that a new trail is opening in this area in 2025, which will hopefully ease up traffic on Bob’s and make it easier to turn this into a more loop-friendly setup.
For now, the classic loop includes climbing up Corrals and finishing with a ride down Bob’s, a solid option but one that definitely requires some time and energy (see Strava Route below).
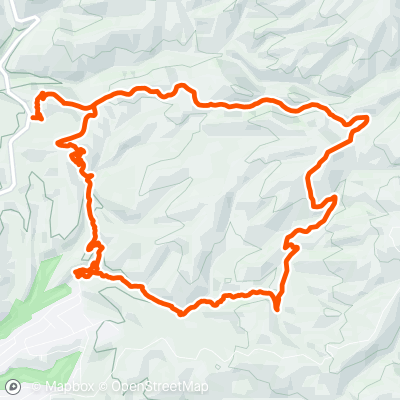
Lately, I’ve been looping Bob’s by heading up the Ridge Access Trail right at the parking lot, then connecting over to 8th Street Connector. This lets me avoid climbing up Bob’s itself, instead accessing it from Corrals on the 8th Street side, giving a different perspective and a bit of variety. Be aware the start of this loop is a bike hike. The trail goes straight up the ridge from the parking lot.
Parking & Access Tips
Let’s talk parking, because the setup here can be a bit of a hassle. Parking for Bob’s Trail is just street parking in a cul-de-sac. While it might be tempting to pedal straight through the neighborhood to reach your car at Camel’s Back (assuming you started in Lower Hulls), keep in mind that this can add quite a bit of extra work!
Bobs trail ends at the bottom of a small ridge, so getting back through the neighborhood can mean tackling some steep streets and hills, easily adding another 350+ feet of climbing depending on where you parked. It’s all part of the ride, but plan on saving a little extra leg power if you’re planning to hoof it through the neighborhood.
Below, you’ll find links to my Strava, where I’ve saved a Strava route that I’ve used to explore this area, plus a full GoPro run of Bob’s Trail from top to bottom.
Thanks for reading and for your support.
Forever two wheels!
-Myles
Strava Route for Bobs:

Parking:
GoPro footage of Bobs Full Run:


